
| Components of Database View | An overview of the areas in Database View. |
| Entity Row | An overview of Entity Row, Column Headers and Selectors. |
| Toolbar | An overview of the Toolbar in Database View. |
| Level Mode | An overview of Level Mode in Database View. |
| Left Sidebar | An overview of the Left Sidebar in Database View. |
| Saved Query | How to Save Queries in Database View. |

Key Components of Database View:
‘Database View' displays all of the existing entities created in an Innoslate project. Features of this view include creating new entities, deleting entities, filtering entities, searching/querying for entities, reporting and more.
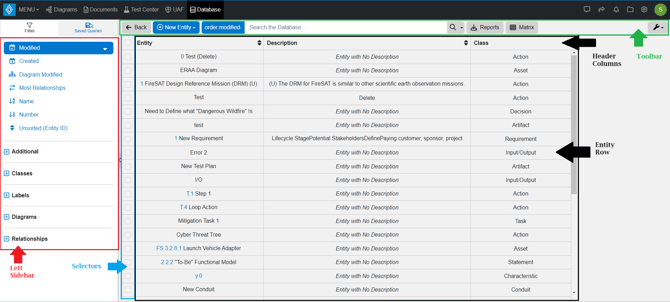
When exploring Database View, it's important to consider these four components:
- Entity Row & Column Headers (Black)
- Selectors (Blue)
- Toolbar (Green)
- Left Sidebar (Red)
Entity Row, Column Headers & Selectors

The largest and primary section of Database View is Entity Row, which showcases a comprehensive list of entities within an Innoslate project. This area has been enhanced with infinite scrolling, eliminating the need for paging. Users can now seamlessly scroll down the page through their project's content. When users first come to this page, the view is defaulted to a list of the project's entities recently modified in descending view.
Users can easily manipulate this main section by using the options available in the left sidebar and the various tools provided in the toolbar.
Modifying Entities in Database View
To modify an entity in Database View, users will now select the entity and make changes on the left sidebar or with the options provided on the toolbar.

As highlighted above, the toolbar will change to provide users the following options to modify an Entity. Below we will review each option.
Open
![]() Users may open the Entity into another View, this dropdown's options are dependent upon the Class of the Entity selected in Entity Row.
Users may open the Entity into another View, this dropdown's options are dependent upon the Class of the Entity selected in Entity Row.
Transform
Users may transform the entity into another entity Class.
Delete
![]() Users may delete the selected entity.
Users may delete the selected entity.
More
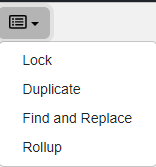
The 'More' dropdown allows users to lock/unlock, duplicate, find and replace words, and roll up the entity's number attributes.
Deselect
![]()
The 'Deselect' option on the top toolbar allows users to focus out of the selected entity. When entities are modified, Innoslate will prompt users to save their changes using the toolbar.

Selectors

The Selector column allows users to select all or certain entities for easier modification of multiple entities. Note, what is checked is what will be changed. The toolbar will change and provides these options as highlighted above. Below each option is covered:
- Bulk Label: Apply or remove labels across all selected entities (re-select a label to remove it).
- Bulk Attributes (v4.12.3): Set or update the same attribute values (e.g., text, number, date) on all selected entities simultaneously for efficiency.
- Bulk Relationships (v4.12.3): Add or remove the same relationships (e.g., "decomposed by," "traced to") to/from a common target entity across all selected entities.
- Transform: Change the class of all selected entities.
- Delete: Remove all selected entities from the database.
- More: Lock, duplicate, or find and replace words across selected entities.
Column Headers
![]()
Users can interact with the Column Headers at the top of Entity Row in Database View v.4.9. The double arrows next to the header's name means the list is unsorted![]() . Users can click on the up and down arrows next to each individual header to sort the entities based on that column in ascending
. Users can click on the up and down arrows next to each individual header to sort the entities based on that column in ascending ![]() or descending
or descending ![]() view.
view.
Users also have the flexibility to resize the column widths by selecting the edge of the column and dragging it to the desired width. This allows users to customize the view to be more comfortable for their needs.
Experience this in the video below:
Toolbar
![]()
When no entity is selected, the Toolbar in Database View v4.9 provides users with a wide range of tools to interact with the view. We will cover each feature from left to right as it is shown above.
Back
'Back' will direct users to their previous view prior to navigating to Database View.
Add a New Entity
Users may add a new entity directly from Database View. The 'New Entity'
provides a dropdown for users to choose the class of the new entity. Note, upon doing so, users will be directed to the new entity's Entity View to enter it's information. After saving the newly created entity, users are directed back to Database View.
Search/Query
The search and query fields, shown and noted below, allows users to search for specific entities within their project's database. When users enter information in these fields, Entity Row will automatically update to display the relevant search results.

The blue bar left of the query field opens up the Advanced Search Editor. The blue bar will then reflect options chosen in the Advanced Search Editor.
Users who are comfortable making queries and/or wanting to add to their search from the Advanced Search Editor may type in a query in the Query Field.
To the very right of the Query Field, in the red box, there will be a ![]() (magnifying glass) to enter a search. Or there is a circled X, as shown in the image above, to clear the Query Field. The down arrow to the right of the circled X allows users the option to clear the Query Field (defaulted option) or Clear both the Advanced Search Editor options and the Query Field.
(magnifying glass) to enter a search. Or there is a circled X, as shown in the image above, to clear the Query Field. The down arrow to the right of the circled X allows users the option to clear the Query Field (defaulted option) or Clear both the Advanced Search Editor options and the Query Field.
Note, any filtering from the left sidebar will also be displayed in the Advanced Search Editor.
Reports
![]()
The Reports option in the toolbar offers users a wide range of options to download their data from Database View. For more information on these reports and how to use them, you can refer to the documentation available here.
Matrix
![]()
The Matrix option allows users to view entities from Database View in the Traceability Matrix. The entities displayed in Database View will be shown on the Y-axis of the Matrix.
Settings

The wrench icon on the top right in the Toolbar of Database View is a dropdown menu as shown above. Below we will cover each option provided:
Entities Per Query
When querying, users may expand the results of their queries from 30, 50 or 100 entities.
Reset View
By selecting this option, Entity Row will be reset to its default view, which displays entities modified in descending order.
Settings Window
When users click on the Settings option in the dropdown menu, a Settings Window will appear. There are 2 sections in this window: General and Level Mode.

Under the General Section, the ‘Global Text Alignment’ switch, when turned on, overrides column alignment preferences by allowing for the global selection of left, center, or right justification of table column data. The ‘Save Scroll Position’ switch, when turned on, maintains the scrolling position upon navigation away from Database View. Users may use the toggle to save their scroll position in Entiity Row.
The row height can be adjusted on a scale from 1x to 16x, allowing users to customize the display according to their preferences.
For Level Mode, click here.
Columns
Users may edit their columns in Database View in the 'Columns' section of the Settings Window.
When managing the columns, users may modify them with the icons on the right, as shown above. From left to right, users may:

add a new column,
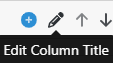
edit the column title,
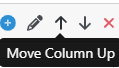

rearrange the columns up or down (note, up is left and down is right when going back to Database view).
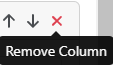
Users may also remove the column from the view.
Level Mode

'Level Mode' offers a structured approach to view entity tiers, where each tier represents a relationship traversal from the previous column. Users can filter the relationships used for traversing between tiers by toggling off the 'Show All Relationships at Each Level' switch and selecting preferred relationships from the 'Level Relationships' dropdown, as illustrated below

Enabling Level Mode will change the Columns section of the Settings Window, illustrated below:

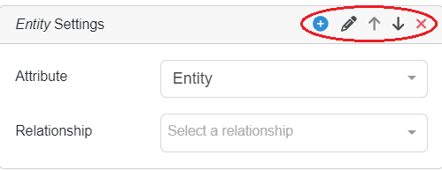
Columns are named by number of level. Users have the option to rename columns in Level Mode. By selecting the pencil icon, the table will provide the below options allowing users to rename the column in the Level 0 field. Users may also choose what attribute of the entity to display in that column. Then they can choose to Save, Cancel, or Reset any changes made with the icons to the right of the text field.

Furthermore, in the Level 3 Settings table, users have the option to add additional levels to their view.

Note, the more levels added, the slower the response time!
Navigating Entity Row with Level Mode Enabled

When Level Mode is enabled, Database View will look similar to the image above (this image has all relationships turned on).
Note the height of the cell for 'St-Pr 1 Action Diagram,' is expanded to match to the entities it's related to in column 2 ('WBS.0.1-WBS.3'). In Level Mode, a cell's height will match the following column's entities it is related to. To see the exact relationship, users may select the entity and go the left sidebar under the Relationships Tab:
 When exploring the various levels in Database View, users may come across cells that display a number. This occurs when there is limited space to show all the entities related to the prior column's entity. The number represents the total count of entities that are related to the entity from the previous column. When users select a cell with a number on it, the left sidebar will update and show a 'Condensed' Tab that lists the entities by relationship. Users may make edits to the individual entities by selecting the pencil.

After making changes to an entity from a numbered cell, note the 'Condensed' tab to go back to the list of entities for that cell, or users may select 'Deselect' to focus on another cell in Entity Row.

Finally, once a modification has been made and the cell has been deselected, users will notice that the 'Save' button becomes available at the top of the toolbar. This allows users to save their modifications.

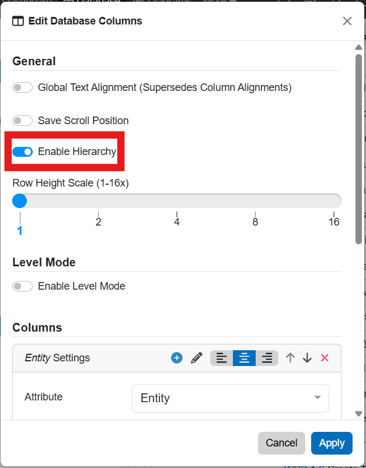
Hierarchy Mode
Left Sidebar

The Left Sidebar consists of two tabs: Filter and Saved Queries.
Let's explore the features of each tab in more detail.
Filter Tab

The Filter Tab enables users to easily filter through their project's database and display only the entities that are relevant to their needs. Users have different filters to choose from in many different categories. As users navigate down the sidebar making selections, they have the ability to add more filters to further refine their search.
The first set of filters are for ordering: 'Modified' 'Created' 'Diagram Modified' 'Most Relationships' 'Name' 'Number' and 'Unsorted (Entity ID).'
Note the following order defaults:
Created, Modified, Diagram Modified, Related: descending default (1-XXX, A-Z,0)
Name and Number: ascending default (A-Z, 0, 1-XXX)
Additional categories from the sidebar include the following additional filters: 'Cross Project,' 'Diagram,' 'Leaf,' 'Orphan,' 'Root,' 'Top'.
Users have the ability to filter the entities in the project based on their entity class under 'Classes.' This list will show all the entity classes in the project, including any new classes that have been added via the Schema Editor.
Upon selecting a class, an Attribute section appears on the sidebar to allow users to filter for entities within a class and a certain attribute.

Depending on the Attribute's data type, the appropriate dropdowns will appear for users to select greater than, less than or equal to options to filter for entities with the desired attribute.

Users may also filter by Labels, Diagram Type and Relationships:

Note, the 'Clear Diagrams' option to the right of 'Diagrams.' This will appear when any filter in the sidebar is selected and indicates a filter is turned on in that category and being reflected in Entity Row. Users should take note of this as they will need to select this Clear option in order to clear out the filter.
Note, filtering options from the sidebar will build a query and be reflected on the toolbar's Advanced Search Editor.
Saved Queries
 Users have the option to save their current query's view by selecting the 'Save Current Query' option under the Saved Queries tab in the sidebar. This allows users to easily access and refer back to their saved queries.
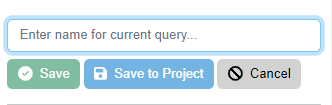
Upon selecting the 'Save Current Query' option, a field will pop up to enter a name for the query as shown below. Users may select 'Save' to save for their own reference. By selecting 'Save to Project', users can share their query with all the users who have access to the project. Or users can cancel out of this view with the 'Cancel' option.
Below 'Save Current Query' option, users will see a table of their Saved Queries. There are three different options; the wrench icon, the pencil icon and the X icon.
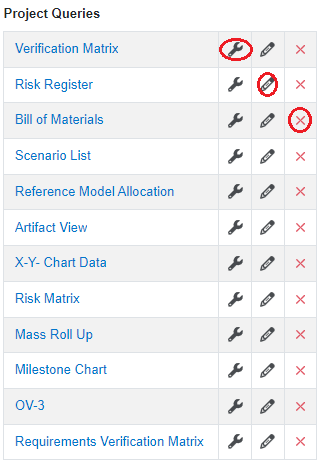
![]() The wrench icon allows users to Edit their Saved Query. The Advanced Search Editor will pop up for users to edit the query.
The wrench icon allows users to Edit their Saved Query. The Advanced Search Editor will pop up for users to edit the query.
 The pencil icon allows users to Edit the Query Name. The name will turn into an editable text field for users to modify it.
![]() The X icon allows users to delete the query from the list.
The X icon allows users to delete the query from the list.
Lastly, users may modify the order of their Saved Queries via drag and drop as shown below:
To continue learning about Database View, Click Here.
(Next Article: Database Variances)