
| Navigate to Entity View | How to navigate to Entity View. |
| Entity View Overview | Overview of Entity View sections. |
| Left Sidebar | Understanding the Left Sidebar in Entity View. |
| Add a Label | How to Add a Label(s). |
| Toolbar | Toolbar Overview in Entity View. |
| Attributes Table | Review of the Attributes Table in Entity View. |
| Relationships Table | Overview of Relationships Table in Entity View. |
| Pinned Relationships | How to pin/unpin relationships. |
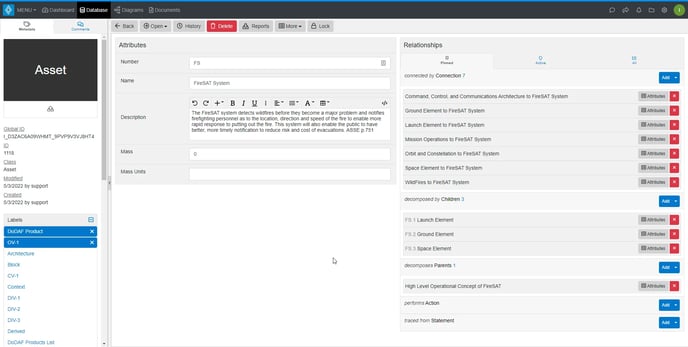
Entity View displays all of the information contained in one entity. Some features of this view include modifying attributes, creating new and modifying existing relationships, assigning labels, and running reports.
Navigation
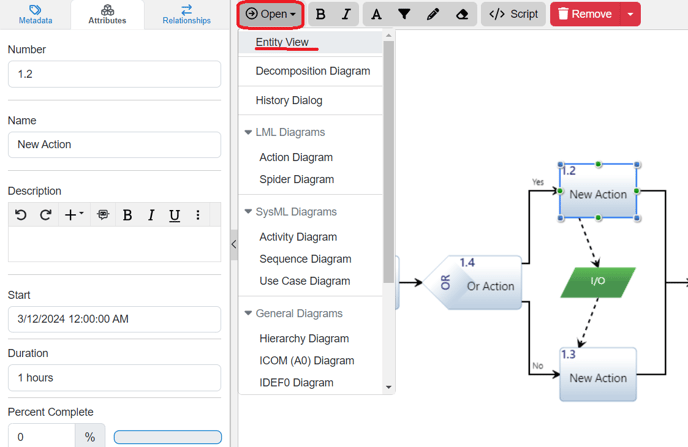
To access Entity View, select an entity from any view and locate the 'Open' dropdown button on the toolbar. Click on the dropdown and choose the option for ‘Entity View’ to access all the information within that entity.
Entity View
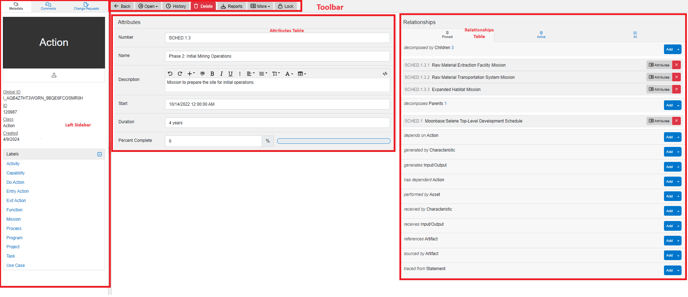
There are 4 main areas to utilize in Entity View:
- Left Sidebar- has 3 tabs for Metadata, Comments & Change Requests
- Toolbar- Interactive options for viewing and modifying the Entity.
- Attributes Table- Attribute Fields to modify Entity attributes.
- Relationships Table- Relationships categorized by Pinned, Active and All are available to the Entity for modifcation.
Left Sidebar
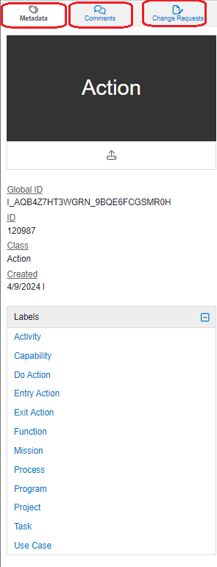
The left Sidebar in Entity View contains three tabs, the Metadata Tab, the Comments Tab and the Change Requests Tab. Please follow the respective links provided for the appicable tab.
Metadata Tab
The Metadata tab provides the entity's metadata information, such as it's 'Global ID', 'ID' (the ID is a project level ID provided to the entity for that specific project), Entity's Class, Created and last Modified date (if appicable).
Add Images to Entities
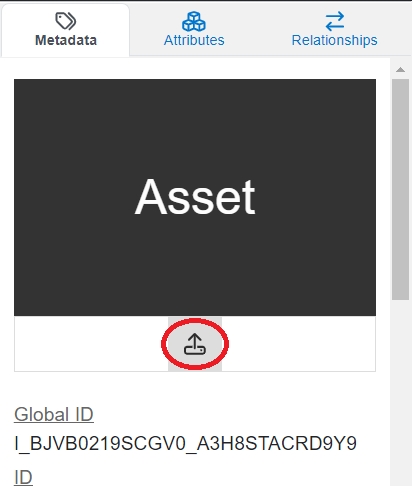
Click the ‘Upload’ button, the up arrow highlighted above, located below the entity’s placeholder image.This causes your web browser’s ‘Open’ file dialog to appear. Browse and select the image you would like to add to an entity and click the ‘Open’ button. Once your image has finished uploading, a thumbnail of your selected image will be displayed instead of the placeholder image. Remember to save by clicking the ‘Save’ button located on the entity row or toolbar throughout Innoslate, to persist your changes to your project’s database.
Note the following on image uploading:
- Placeholder images are displayed for every entity when an image has not yet been added.
-
Placeholder images are composed of a black background with the name of the schema-based class centered in the foreground.
- Only the Asset Diagram will display uploaded pictures for Asset entities in an Asset Diagram canvas.
Add a Label
The Labels table is below the above information. Applicable labels for that particular class will be available here. Users may collapse/uncollapse this table and/or select/deselect labels for the entity. The behavior of this table is displayed in this video:
Toolbar
![]() The toolbar at the top of Entity View offers a range of additional features specifically designed for the selected entity, enhancing functionality and customization options. We'll cover each option from to left to right below.
The toolbar at the top of Entity View offers a range of additional features specifically designed for the selected entity, enhancing functionality and customization options. We'll cover each option from to left to right below.
'Back' Allows users to revert back to the view they were in before navigating to Entity View.
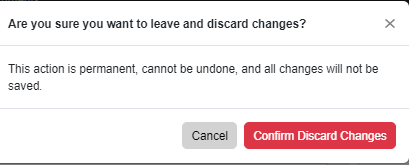
'Cancel' will prompt a dialogue box to discard changes just made and leave Entity view, as shown here:
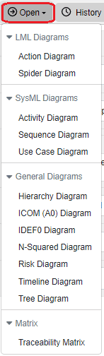
'Open' is a dropdown to open the Entity in other appicable views/diagrams.
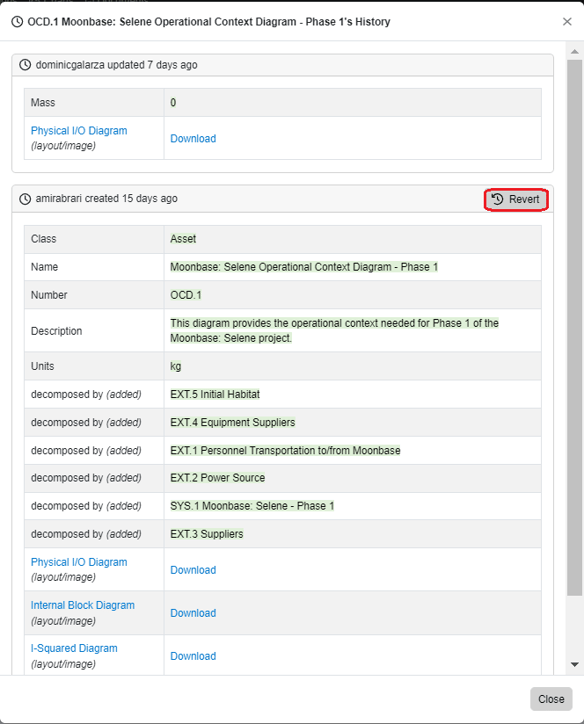
'History' will open the History Dialog window to allow users to revert back to a particular version of that Entity.
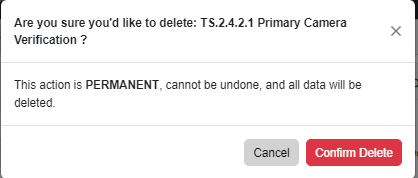
'Delete' will permanently delete the entity. A prompt will appear to confirm this action:
'Reports' will provide a dropdown to download reports. Click here for more information on those.
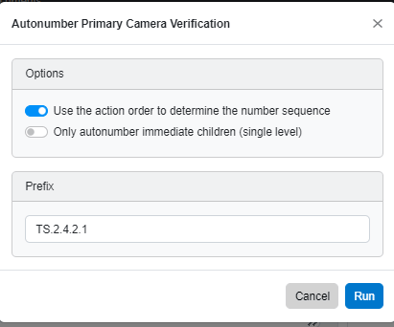
'More' is a dropdown that allows users to Auto Number, Duplicate, Rollup and Transform. Note, depending on the class, there may be less options provided.
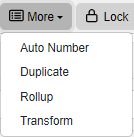
- Auto Number will prompt a window to allows users to add a prefix and auto number the single level of the entity. If it's an action it will provide the option to allow the action order to number.
- Duplicate will duplicate the entity, it's attributes and relationships. This new entity will be renamed 'Copy of....'
- Rollup is only available for Action entities, and subclasses of Action entities, and will prompt users to select which attribute. Users can find more on the rollup here.
- Transform will provide a dropdown menu to allow users to change the class of the entity.
'Lock' will lock the entity's fields so other users may not make changes to it. Note, only users with the owner and collaborator roles may unlock it.
Attributes Table
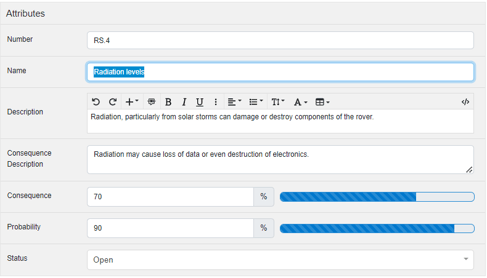 The Attributes Table provides users the ability to add and/or modify the entity's attributes. Users can input attribute data for that specific entity. This feature is not meant for adding additional attributes to the class, as users have the ability to add attributes to a class using the Schema Editor.
Relationships Table
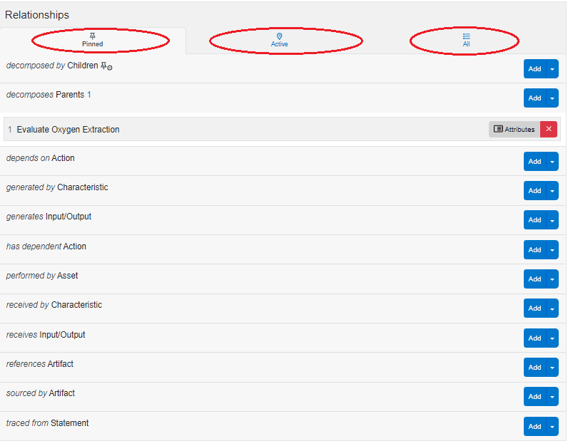 Within the Relationships Table in Entity View, users can effectively manage the entity's relationships. This table offers three tabs - 'Pinned', 'Active', and 'All' - allowing users to easily view and interact with the relationships associated with the entity across these specific categories.
Pinned relationships are specific relationship types that can is set by default or customized by users. These relationships are "pinned" to the list for easy access, allowing users to quickly navigate to a specific relationship when needed. Users may pin/unpin relationships from any relationships view, not just Entity View (this became available in 4.9). When users hover their mouse to the right of the relationship type, users may pin/unpin the relationshipt to appear/disappear from the the 'Pinned' list. The behavior of utilizing the pin icon to make a pinned relationships can be viewed in the video below. Note, the +/- part of the icon indicating it is pinned/unpinned.
The 'Active' tab refers to the relationships that the Entity is currently actively utilizing.
The 'All' tab provides all the relationships the entity can have with other entities, by class.
To add relationships, please see the article on Entity Relationship Management.
To make a relationship to an entity from another project, please see the article on Cross-Project Relationships.
To continue learning about Entity View, Click Here.
(Next Article: Entity Relationship Management)