
| Function | Description |
| Creating a Kanban Board | Create your own Kanban Board with Innoslate's Chart View. |
| Kanban Board View | The Kanban Board View displays the issues of the current repository. |
| Kanban Board Settings | Sort tasks, show/hide attributes, create number levels, view & assign tasks, show/hide cross-project indicators, and see the grid view in Kanban Board Settings. |
Creating a Kanban Board
Step 1: Navigate to ‘Charts Dashboard’, then click on ‘New Chart’.

Step 2: Select ‘Kanban Board’ and choose either the ‘Blank Board’ or ‘Project Workflow Board’ board template. The ‘Blank Board’ starts without any columns while the ‘Project Workflow Board’ adds 4 columns by default: ‘To Do’, ‘In Progress’, ‘In Review’, and ‘Done’ to the board. Once you have the template selected, click ‘Next’.

Step 3: Give the root Task a Name or Number, then click ‘Next’, then click ‘Finish’.


When working with the Kanban Board View, it's important to understand the three main components that make up this view:
- Left Sidebar
- Toolbar
- Kanban Board
When nothing is selected from the Kanban Board, the left sidebar will have two tabs:
1) Root
2) Comments
Root Tab
The Root Tab on the Left Sidebar allows users to edit the Root Entity by clicking on the name of the Root Entity. Simply click on the name to display the Root Entity's Name, Number and Description fields for editing:

Select 'Done' to Save or 'Cancel' to negate your changes.
Comments Tab
These comments are a part of the Root Entity of the Calendar. For more information on the functionality of the Comments, please refer to this article.
Toolbar

The top toolbar is above the Kanban Board and under the Navigation bar. The Kanban Board toolbar features the following options:
'Back' Takes users back to the previous view.
'Open' This allows users to see the Kanban Board's Root Entity in another view.
Reports From Kanban Board View, users may download a PNG, HTML Image or a DOCX image of the Kanban Board.
'+New' Can add Columns or Tasks as explained below:
Adding Columns
To add a column to the Kanban Board, click the ‘New’ button dropdown in the toolbar and then either ‘New Column’ or ‘Relate Existing Column’.

If creating a new column, specify a name or number for the column and then click ‘Add’.

If adding an existing column, use the entity multi-selector in the dialog to choose 1 or more columns and then click ‘Add’.Note, Columns are sorted by number, from left to right.
Adding Tasks
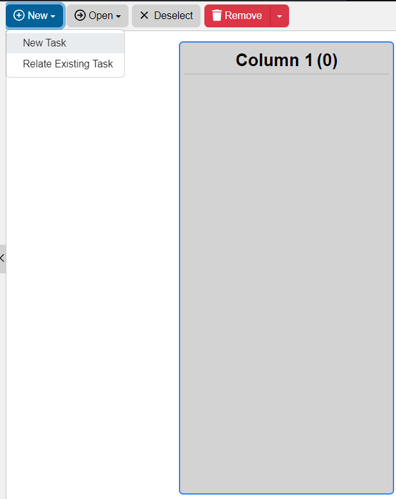
To add a Task entity to the Kanban Board, click the ‘New’ button dropdown in the toolbar and then users may select from either ‘New Task’ or ‘Relate Existing Task.'

If creating a 'New Task', choose a column to add the Task to, and then click ‘New'. If a column is not selected before adding a new task, the task will automatically be added to the leftmost column as a default.
If adding an existing Task select a column to add the Task to, then use the entity multi-selector in the dialog to choose 1 or more Task entities, and then click ‘Add’.

Kanban Board Settings

The wrench icon located at the top right corner of the toolbar in the Kanban Board View offers a variety of options to customize the Kanban Board. These options will be further elaborated on below.
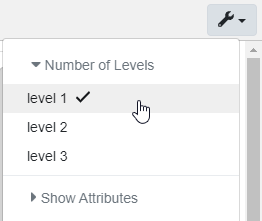
Number of Levels
To change the number of levels of tasks shown on the board, click on the wrench button at the top right, then expand the ‘Number of Levels’ dropdown menu. By default, the board will pull in all tasks directly associated with a column on the board at Level 1. Increasing the level will bring in all the tasks directly associated with a column plus each of their children via the decomposed by relationship. Dragging the parent task to another column will also bring all of its children to the new column. However, if a child task is moved to a different column, that task now belongs to the new column at Level 1, and will not move to other columns when the parent is moved.
Show/Hide Attributes
To change which attributes are shown on the task cards, select an attribute to show/hide it from each task card.
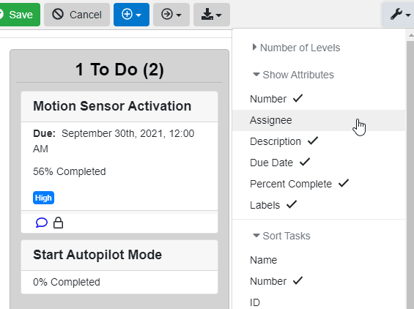
Sorting Tasks
To view and/or change the task sort choice, click on the wrench button at the top right, then expand the ‘Sort Tasks’ dropdown menu and click a sort option to change the sorting method to the new choice. By default, all tasks are sorted within their columns by Number.

Edit Column Colors

When you select 'Edit Column Colors', you can customize the colors of the Kanban Board Columns and the text displayed on the board. To change the color of the Columns, choose 'Background,' and for text, choose 'Text.' Use the pencil icons to select your preferred colors. The Eraser icon next to each pencil will undo any changes made. Click 'Apply' to save your changes, or 'Cancel' to exit the window.
View All/Only My Assigned Tasks
To view and/or change whether all tasks are shown on the board or just the ones assigned to you, click on the wrench button at the top right, then click either ‘View All Tasks’ or ‘View Only My Assigned Tasks.' Clicking the latter will hide any task not assigned to the current user from the Kanban Board. By default, all tasks are shown, regardless of Assignee(s).
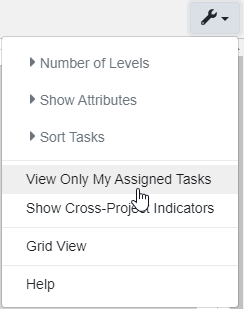
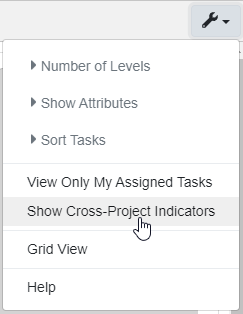
Show/Hide Cross-Project Indicators
To show/hide the cross-project indicators, click on the wrench button at the top right, then click either ‘Show Cross-Project Indicators’ or ‘Hide Cross-Project Indicators’.
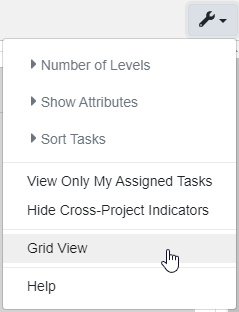
Grid View
To toggle Grid View, click on the wrench button at the top right, then click ‘Grid View’ to view a database view-like display of all the tasks on the Kanban Board. To return to the normal Kanban View, click ‘Kanban View’ where the ‘Grid View’ button was.

Each of the columns in the Grid View is alphanumerically sortable by clicking the arrows button next to the column you want to sort the tasks by. By default, the tasks are sorted by their respective column name.

The tasks may also be selected and edited by clicking that row.

Kanban Board
Innoslate users may select 2 parts of the Kanban Board, a column or a task. Below we will cover how the view changes when either are selected.
Select Column or Task
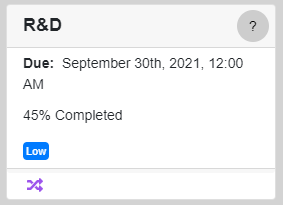
Click on a column or task to focus on it, which will then show the ‘Metadata’, ‘Attributes’, and ‘Relationships’ tabs on the left sidebar, underlined in the image below. Changing the Name, Number, Description, Due Date, Assignee, Percent Complete, or Labels on the Task entity under the Attributes tab will be reflected immediately on the Task card on the Kanban Board.

As displayed above, hovering over the assignee icon lists all the users assigned to that task, if any. Tasks that are locked will show a lock icon in the lower left-hand corner and likewise, tasks with at least 1 unresolved comment will show a comment blurb icon. Hovering over this icon will tell you how many unresolved comments there are for that task.
Click-and-drag a task onto another column to easily move tasks between columns. The tasks will then automatically be sorted according to the Kanban Board’s task sort choice.
Tutorial Video
To continue learning about Charts Dashboard, Click Here.
(Next Article: Calendar Chart)