
| Auto Number | How to Auto Number a Test Suite. |
| New Test Cycle | Capture a snapshot of your test cases before resetting. |
| Reset a Test Cycle | How to reset a Test Suite's results. |
| Acronym Extractor | Extract Test Suite Acronyms for team reference. |
| Find & Replace | Find and Replace text for easy editing. |
| Search & Settings |
Searching Test Suite and using settings options. |

Below we will explore the various features available under the 'More' option in Test Suite View.
Auto Number
Auto numbering in Innoslate allows for the application of sequential numbers to entities within a Test Suite, based on their hierarchical structure. This feature can be accessed by clicking on the 'More' dropdown in Test Suite View. Once selected a pop-up window will appear, allowing users to specify the starting number (defaults to 1 if left blank) and add a prefix, or choose to only add a prefix to the existing numbering scheme of the Test Suite.

Note this will only add to the number field of an entity. To find and replace within the number field, use the Find and Replace feature.
Users may also use the Auto Number feature for just a certain section of the document by clicking on a parent entity within the Test Suite and clicking on 'More' then 'Auto Number.' Doing so will bring up the following window so users may selecto to re-number and/or add a prefix for that particular section of the Test Suite:

Test Cycle
![]()
Creating a Test Cycle for a Test Suite captures a snapshot of the Test Suite's entities, relationships, and attributes. To create a Test Cycle, select the 'Test Cycle' option under the 'More' button on the top toolbar. Please note that only users who have the role of 'Owner' in the project are able to create a Test Cycle for a Test Suite.
A window will appear to name the Test Cycle, as displayed below.
The pop up will also include a toggle to be able to "Add Signature" in two ways: 1) Draw Signature 2) Generate Signature. For more on the e-signature, please see: e-signature
Click 'Create.'

The Test Cycle will be available to reference on the left sidebar under the 'Test Cycles' tab.
Reset Test Cycle
![]()
Once a Test Cycle is saved, users may use the 'Reset Test Cycle' option to clear their 'Actual Result' attributes and change the 'Status' attribute to 'Not Run.' BEfore the changes happen, a window will pop up to warn users this happens. To continue with the reset, click 'Save and Reset.'

Acronym Extractor
![]()
The Acronym Extractor feature in Innoslate enables users to extract all acronyms from a Test Suite and compile them into a separate document, along with their corresponding full names.
Select the ‘Acronym Extractor’ button located in the menu of the document. When users select the 'Acronym Extractor' option, a popup will appear, allowing users to choose the 'Extraction Options' and the 'Confidence Level' under the 'Setup' tab. The 'Extraction Options' determine which fields the extractor will use to extract acronyms from the document's entities. While the extractor will display all acronyms for the corresponding confidence level, the 'Confidence Level' selected in this step will be the one initially displayed in step 3.

- A 95% Confidence level means that the acronym is found multiple times in the document with a possible detected definition.
- A 65% Confidence level means that an acronym is found once with a possible detected definition.
- A 40% Confidence level means that an acronym was found but there was not a definition detected with it.


- Under ‘Acronym Document’ users can select which document to add the acronyms to. Those options include adding acronyms to that specific document’s acronym document or to an overall project’s acronym document.
- Under ‘Traceability’ users can select to create traceability from the acronyms to the current document to the acronym document.
- Under ‘Hyperlinks Creation’ users can select to create hyperlinks to those acronyms in the document.

Upon selecting the 'Create' button, Innoslate users will be redirected to the Acronyms Document, where they will find all of the acronyms they have selected. Note, the Acronyms Document is placed on the Documents Dashboard.

Find and Replace
![]()
The 'Find and Replace' feature allows Innoslate users to find and replace certain words or phrases within the document.After selecting 'Find and Replace' under the 'More' button, a pop-up window will appear, allowing users to choose which entity attributes to use for finding the words or phrases. This dropdown will allow users to select any combination of the 'Name.' 'Number' or 'Description' fields. Provide the text to search for using the 'Find' field, then provide the new text with the 'Replace' field. Make the search case-sensitive by turning the 'Match Case' toggle on. Click 'Next' for the results.

In the 'Results' tab, a list of entities with instances of the word searched for will be displayed.

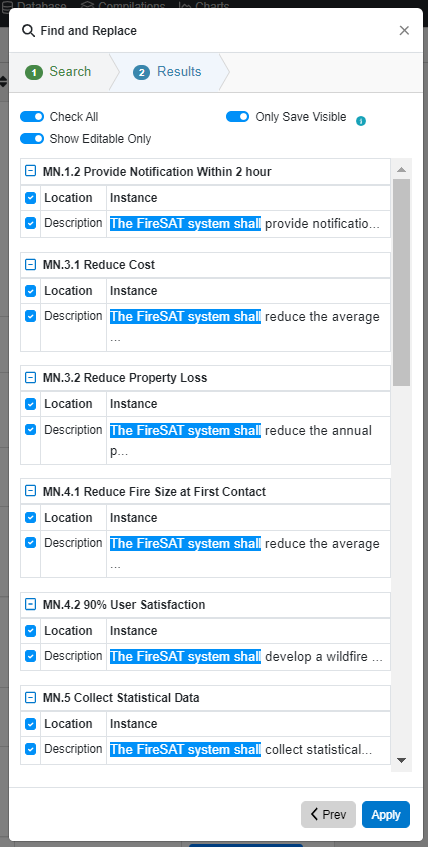
Click 'Apply' once complete and the replacement will execute.
Search & Settings
Search
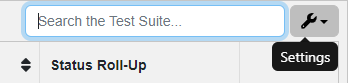
The 'Search' Field, indicated by the red box below, provides users with the ability to search for specific words or phrases within the name, number, and description fields of the entities in the document.
![]()
Upon entering a query, like below:
![]()
the Test Suite will highlight the entities that contain the search query. In the example above, the query 'vehicle' is found in 8 entities within the Test Suite(indicated by the red square in the image above). These entities are highlighted in the document (image below). The first highlighted entity, highlighted in orange, represents the initial focus of the search results. By using the up and down arrows next to the search field results (image above), the orange highlight will move to the corresponding entity. To close the search and remove the highlighted entities, simply click the red 'X' (image above).

Settings
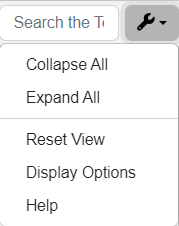
The Settings dropdown is the wriench icon on the top right corner of Test Suite View. The above dropdown appears so users may 'Collapse All' or 'Expand All' children Test Cases so only parent Test Cases appear.
Users may also use 'Reset View' to bring the Test Suite back to defaulted view (expanded and with the Entity, Expected Result, ACtual Result, Status and Status Roll Up columns.
Display options will allow users to modify their Test Suite View. A window will pop up for users to add more attribute columns to their view (all applicable options are provided in the image below).

Within the General section of the Display Settings Pop Up, users have the ability to configure various aspects of Test Suite View.
Users have the option to choose their focus when selecting a Test CAse. The 'Focus' dropdown options are 'Name', 'Number' or 'Description.'
The options below the 'Focus' dropdown can be turned on or off with the toggles next to them. These options are listed below with their descriptions.
- 'Always use Test Suite's meta value for number' Instead of displaying the manually entered numbers in the number field, this toggle allows for the use of meta numbering specifically for that document. This makes it easier for users to reference the entities. To revert back to the manually entered numbering, simply toggle off this option.
- 'Always show Test Suite in paper mode' This feature will display your Test Suite in a paper-like format. However, please note that enabling this toggle will limit the data visible to only 'Name', 'Number', and 'Description' fields. If you want to view attributes and other metadata, users should deselect this option.
- 'Capture image of Test Suite when saving or leaving' This toggle refreshes the thumbnail image of the Test Suite's Test Suite card on the Test Center Dashboard.
- 'Keep horizontal scroll position when selecting an entity' This feature enables seamless navigation, ensuring that the horizontal scroll remains fixed even when scrolling vertically.
To continue learning about Test Suite Reports, Click Here.
(Next Article: Navigating Test Suite View)