
Elements Available in this Section
| Element | Description |
|---|---|
| Class | Learn the fundamental element of Schema Editor which allows you to categorize and classify elements based on their characteristics/attributes in Innoslate. |
| Attributes | Learn how to create an Atribute for a Class in the Schema Editor. |
| Labels | Learn how to utilize labels from Schema Editor, providing a flexible way to tag and categorize entities, enhancing organization and search ability in Innoslate. |
| Relations | Learn about the power of relationships from Schema Editor, allowing users to establish connections and dependencies between different entities on Innoslate. |
Class
From the ‘Schema Editor,’ you can customize the current set of classes defined in your project’s database schema.
Note, that in order to perform each of the customization tasks outlined below, it is necessary to first have “Classes” highlighted in the ‘Schema’ tab of the left sidebar. This toggles the view to display a list of the currently defined schema-based classes.

Adding a New Class
- Within the ‘Schema Editor,’ ensure “Classes” is highlighted in the left sidebar.
- Select the blue ‘New Class’ button located on the toolbar.

- The view will update to display a ‘Create New Class’ form. Here you can type in the name, description, hide it or give it a parent class. There is also an option for your new Class to be ‘Abstract’ which serves as a blueprint for child classes. This means that entities cannot be this exact class but the new class created will inherit relationships and attributes if they are assigned as a child of a class.

- Give it Attributes.
- When you have finished entering information, click the ‘Save’ button located on the toolbar to persist your changes to your project’s database schema.
Editing an Existing Class
- Within the ‘Schema Editor,’ ensure “Classes” is highlighted in the left sidebar.
- Locate the class you would like to edit and click the ‘Edit’ button on the right within the class’ displayed row.

- The view will update to display an ‘Edit’ form, where you can change the attributes of the existing class.

Please keep in mind that the 'Schema Editor' allows users to easily edit attributes of user-defined classes within the default schema. However, certain fields that are predefined in the schema are grayed out to prevent any changes that may impact the tool's functionality. - Click the ‘Save’ button located on the toolbar to persist your changes to your project’s database schema.
Hiding a Class
- Within the ‘Schema Editor,’ ensure “Classes” is highlighted in the left sidebar.
- Locate the class you would like to hide and click the ‘Hide’ button on the right within the class displayed row.

- If you’d like to show an already hidden class, click the ‘Show’ button on the right within the class’ displayed row.

Class Attributes
An attribute is an inherent characteristic or quality of an entity. It further describes the entity, enhancing its uniqueness. Every attribute has a name and a specified data type. We applied the LML definition of an attribute to the individual pieces of information which can be stored within an entity.
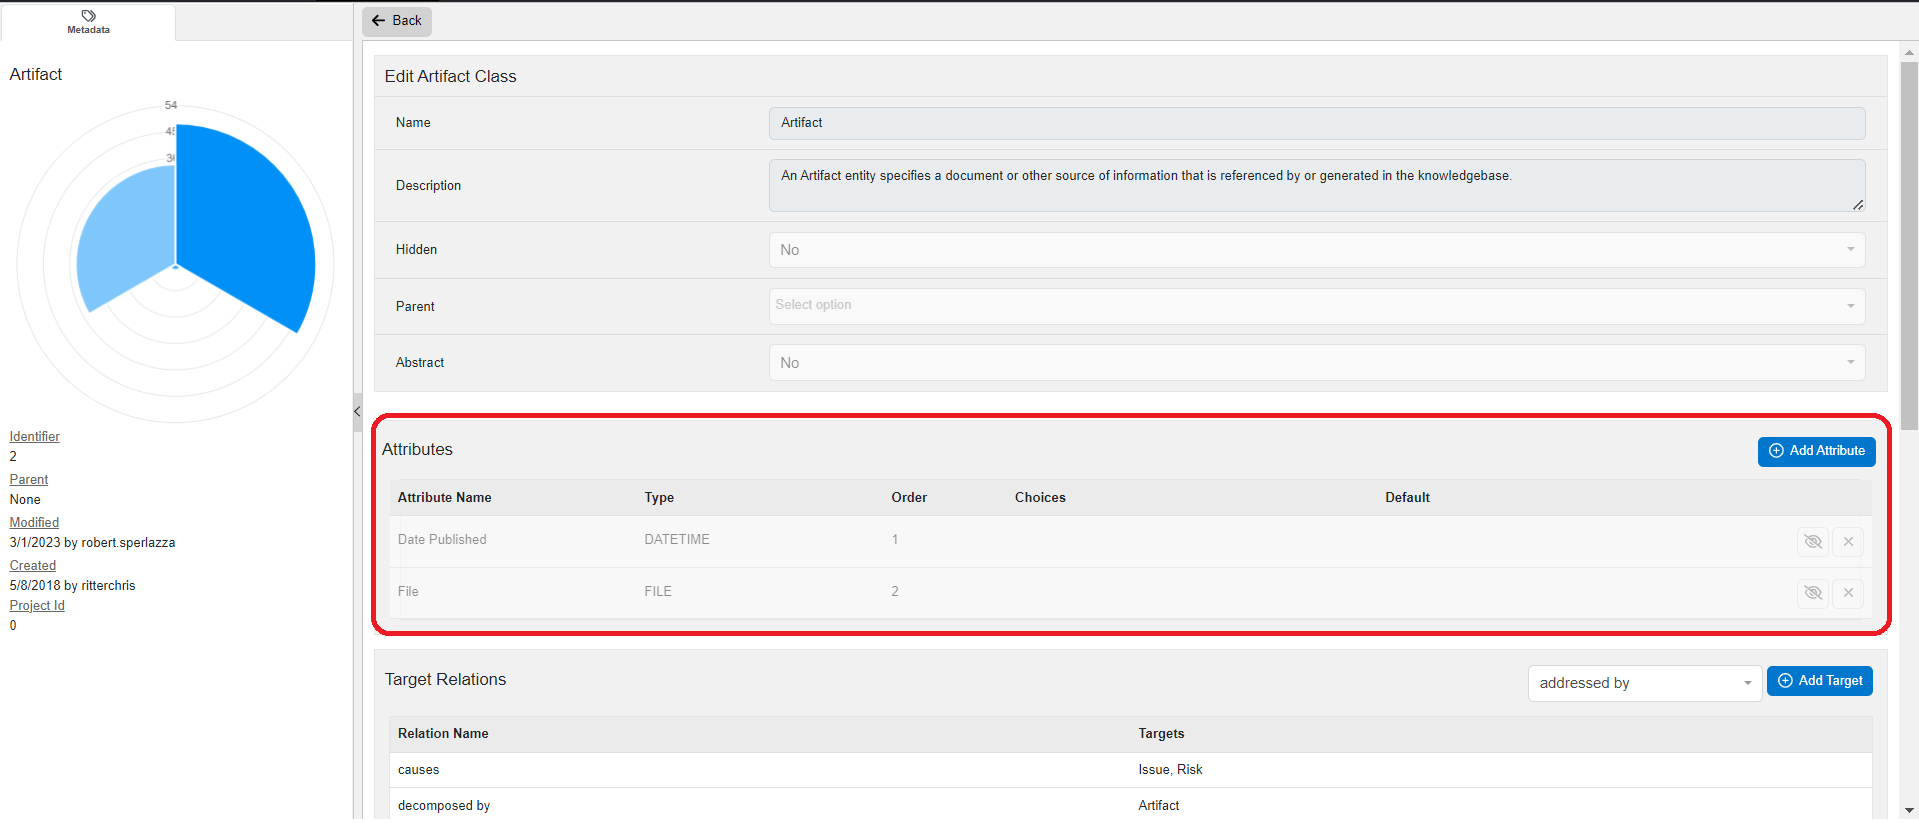
Under each Class's page within the Schema Editor, there is an Attributes table for users to add attributes to classes. Below is the Attributes Table for the Artifact class, for reference.
Innoslate‘s default database schema includes the eight mandatory LML attribute data types
-
Text- a single character, single word, or multiple words in plain text
-
Number- any individual real number (Numbers and period characters only) or distribution
-
Boolean- Yes (True) or No (False), this is fixed
-
Percent- a special case of Number where the value is restricted to values between zero and one hundred, inclusive, provides a selector and visual indicator
-
DateTime- a specific method of storing a given date and time value only field
Ex: 4/22/2-26 8:00:00 AM, also provides a calendar and time UI to select from.
-
URI- a special case of Text where the value must be a Uniform Resource Identifier or web address EX: https://www.google.com
-
Enumeration- a set of defined choices, where the selection of only one choice is permitted with a dropdown.
-
GeoPoint- a longitude and latitude pair on the surface of a body
and ten additional attribute data types:
-
Big Text- any multiple lines of plain text
-
File- Allows users to upload a file. Then once uploaded, can be downloaded, previewed or removed (depending on project role).
-
Duration- 1 field for number, value, or distribution and another field to determine unit of time (seconds to years)
-
Quality- any boolean parameter used to identify better requirements, i.e., Quality Check Attribute (does not automatically include attribute to Quality Check computation)
-
Computable- Allows for equating other attributes. See Computable Attribute
-
Equation- Utilizes a LaTeX editor to display equations.
-
HTML- a Rich Text Field for users to be able to utilize HyperText Markup Language
-
Multiselect- a defined set of named values selected with a dropdown in the project. Multiple options can be selected.
-
User Team- Select a Team defined from your organization's Admin Dashboard.
- Multiplicity- indicates the number of instances or occurrences of the entity. This is a plain text numeric field.
In v4.14, you may set default attributes on the organization level.
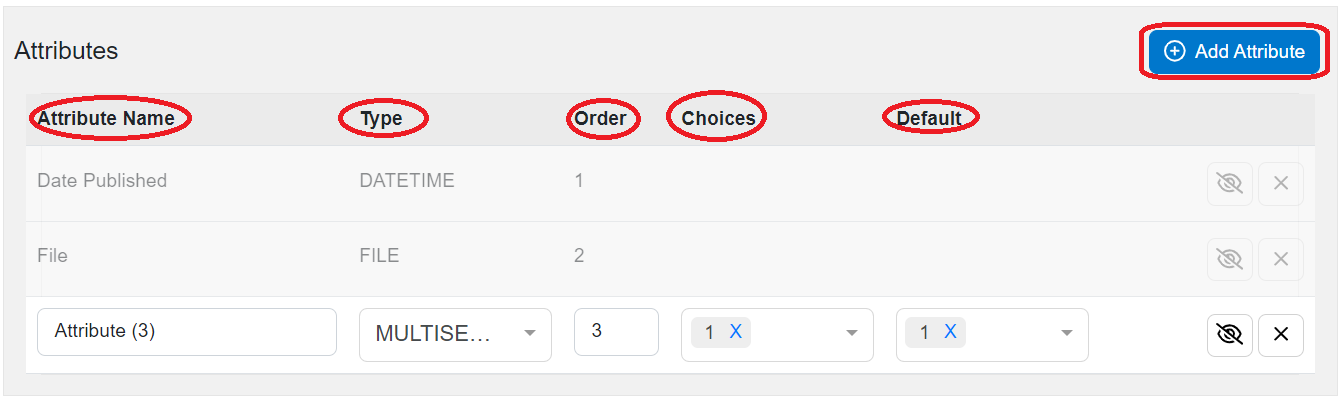
Creating an Attribute
-
When adding an Attribute with the blue 'Add Attribute' button on the top right of the table, a new row will appear to allow users to give it a data type.
-
Attribute Name,
-
select its 'Data Type'
-
lselect the Order that the Attribute will appear in Innoslate
-
add in choices if using a data type like Multi Select, and
-
choose the default choice for that particular attribute, if applicable.
-
- Select Save on the top of the Class page.
The options to the very right allow users to hide/show (Eye icon) the Attribute in the project. Note that attributes that are built in will not be available to hide, so those will be grayed out, like the File and Date Published attribute as shown above. The 'X' next to the Eye Icon will remove an attribute.
Tutorial Video
Labels
From the ‘Schema Editor,’ you can customize the current set of labels defined in your project’s database schema.
Note, that in order to perform each of the tasks outlined below, it is necessary to first click on “Labels” in the ‘Schema’ tab of the left sidebar. This toggles the view to display a list of the currently defined schema-based labels.

Adding a New Label
- Within the ‘Schema Editor,’ ensure “Labels” is highlighted in the left sidebar.
- Click the blue ‘New Label’ button located on the toolbar.

- The view will update to display a ‘Create New Label’ form. Here you can quickly type in the name, description, and other attributes of your new label.

- When you have finished entering information, click the ‘Save’ button located on the toolbar to persist your changes to your project’s database schema.
Editing an Existing Label
- Within the ‘Schema Editor,’ ensure “Labels” is highlighted in the left sidebar.
- Locate the label you’d like to edit and click the ‘Edit’ button on the right within the label’s displayed row.

- The view will update to display an ‘Edit’ form where you can change the attributes of the existing label.

Note that the ‘Schema Editor’ only allows users to edit attributes of user-defined labels added to the default schema. All labels included in the schema by default are locked. - Click the ‘Save’ button located on the toolbar to persist your changes to your project’s database schema.
Deleting a Label
- Within the ‘Schema Editor,’ ensure “Labels” is highlighted in the left sidebar.
- Locate the label you’d like to delete and click the ‘Delete’ button on the right within the label’s displayed row.

You can also delete a label from the ‘Edit’ form.
Note that the ‘Schema Editor’ only allows users to delete user-defined labels added to the default schema. All labels included in the schema by default are locked.
Hiding a Label
- Within the ‘Schema Editor,’ ensure “Labels” is highlighted in the left sidebar.
- Locate the label you would like to hide and click the ‘Hide’ button on the right within the label’s displayed row.

- If you’d like to show an already hidden label, click the ‘Show’ button on the right within the label’s displayed row.

In v4.14, nested labels now display in the Metadata Sidebar.
Tutorial Video
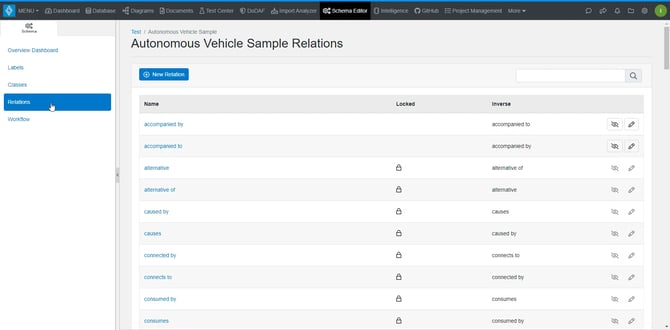
Relations
From the ‘Schema Editor,’ you can customize the current set of relations defined in your project’s database schema.
Note, that in order to perform each of the tasks outlined below, it is necessary to first click on “Relations” in the ‘Schema’ tab of the left sidebar. This toggles the view to display a list of the currently defined schema-based relations.
Adding a New Relation
- Within the ‘Schema Editor,’ ensure “Relations” is highlighted in the left sidebar.
- Click the blue ‘New Relation’ button located on the toolbar.

- The view will update to display a ‘Create New Relation’ form. Here you can quickly type in the name, description, and other attributes of your new relation.

- When you have finished entering information, click the ‘Save’ button located on the toolbar to persist your changes to your project’s database schema.
Editing an Existing Relation
- Within the ‘Schema Editor,’ ensure “Relations” is highlighted in the left sidebar.
- Locate the relation you would like to edit and click the ‘Edit’ button on the right within the relation’s displayed row.

- The view will update to display an edit form, where you can change attributes of the existing relation.

Note that the ‘Schema Editor’ only allows users to edit attributes of user-defined relations added to the default schema. All relations included in the schema by default are locked.
- Click the ‘Save’ button located on the toolbar to persist your changes to your project’s database schema.
How to Access and Edit Relationship Attributes
To view or create these attributes:
- Open the Schema Editor and select 'Relations' on the left sidebar.
- Select the relevant relationship.
- Locate the Attributes pane and select the 'Add Attributes'.
- Attributes user can add follow the attribute data types mentioned above.
- Enter Attribute Name, data type, Order, and if applicable Choice or Default.
- Select 'Save' on top of page.
Hiding a Relation
- Within the ‘Schema Editor,’ ensure “Relations” is highlighted in the left sidebar.
- Locate the relation you would like to hide and click the ‘Hide’ button on the right within the relation’s displayed row.

- If you’d like to show an already hidden relation, click the ‘Show’ button on the right within the relation’s displayed row.

Tutorial Video
To continue learning about Schema Editor, Click Here.
(Next Article: Workflow)