Importing Microsoft Word (.docx) Files
Importing Microsoft Word (.docx) Files into Innoslate's Import Analyzer.
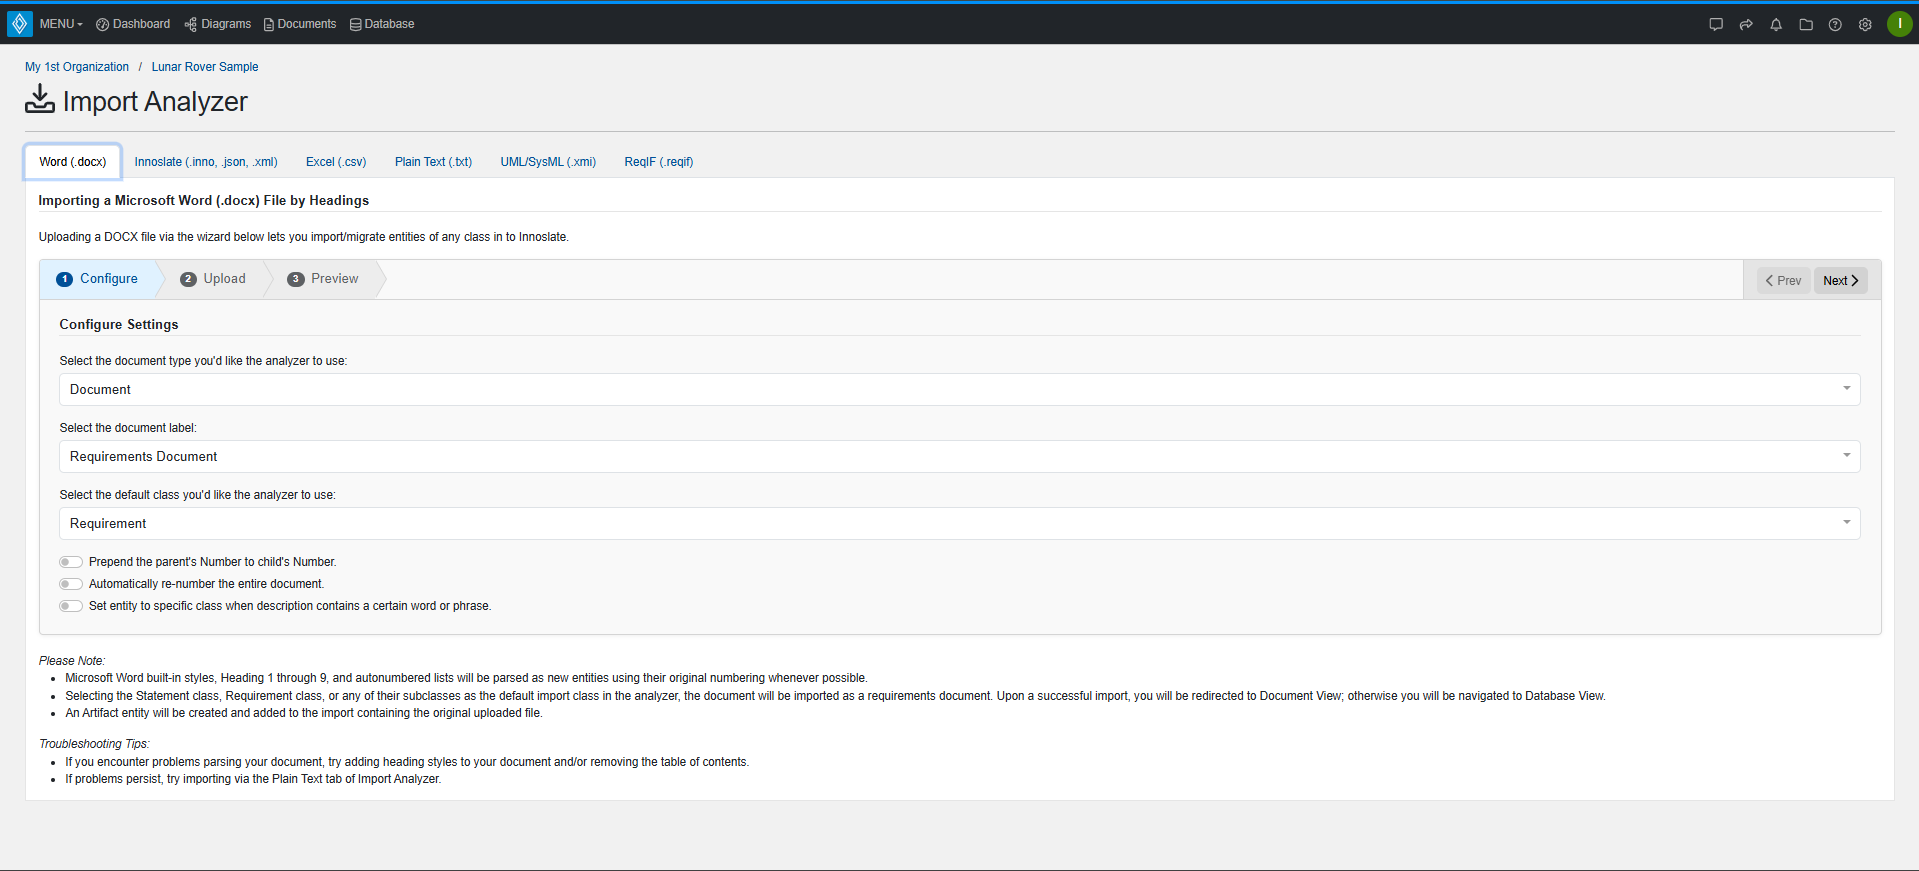
The Import Analyzer consists of three essential steps that users must follow to configure their DOCX import and accurately map their data into the Innoslate Schema.
- Configure Settings
- Upload a File
- Preview of Import

In the following sections, we will break down each step as noted above, providing clear and detailed instructions to assist you throughout the process.
1. Configure Settings
-
Open the 'Import Analyzer' and select the ‘Word (.docx)’ tab.
-
Select the Document Type. Choose the type of document you want the analyzer to process. The available options are:
-
Document – Enables the label selection option in Step 3.
-
Test Suite – Does not provide a label selection option in Step 3.
-
Compilation – Does not provide a label selection option in Step 3.
-
Presentation – Does not provide a label selection option in Step 3.
-
None – Does not provide a label selection option in Step 3.
-
-
(Optional) Assign a Document Label
If you selected Document in Step 2, choose an appropriate label for the document type in the Documents view.
-
New labels will automatically appear if the schema has been updated.
-
-
Configure Default Entity Class and Numbering Behavior. Specify the default class for entities that will be created during the import. You can type the desired class directly into the field or select it from the drop-down list. The following options are available:
- Prepend the parent's Number to child's Number – Inherits and prefixes the parent entity's number to child entities.
- Automatically re-number the entire document – Reapplies sequential numbering across all entities in the document.
- Set entity to specific class when description contains a certain word or phrase – Automatically assigns a specified class based on keywords in the description. By default, this rule assigns the Requirement class when the description contains the words "must", "shall", or "will". You can remove these default keywords and class to add additional ones as needed (this option is only available when Document is selected in Step 2).
5. Select 'Next'
2. Upload a File
 1. Drag and drop your .docx file over the drop area, or click within the drop area to browse your computer’s file system to select the file to upload.
2. When your ‘Analyzer Progress’ bar reaches 100 percent, ‘Done,’ click the ‘Next’.
3. Preview of Import

1. Verify that the preview of the import is what you were expecting. Each row in the preview represents a single entity, while each column corresponds to specific mapping information as indicated by the respective column headers.
2. To finish the import process and save the entities to your current project’s database, click the ‘Save’ button. To go back, modify your text and try importing again, click the ‘< Prev’ button to return to the previous step in the process.
3. You will then be navigated to the Document in Documents View.
- Microsoft Word built-in styles, Heading 1 through 9, and autonumbered lists will be parsed as new entities using their original numbering whenever possible.
- Selecting the Statement class, Requirement class, or any of their subclasses as the default import class in the analyzer, the document will be imported as a requirements document. Upon a successful import, you will be redirected to Document View; otherwise you will be navigated to Database View.
- An Artifact entity will be created and added to the import containing the original uploaded file.
- If you encounter problems parsing your document, try adding heading styles to your document and/or removing the table of contents.
- If problems persist, try importing via the Plain Text tab of Import Analyzer.
Tutorial Video
To continue learning about Import Analyzer, Click Here.
(Next Article: Importing Microsoft Word (.docx) Files (v4.10 & below))
