Import Microsoft Excel (.csv) Files into Innoslate through the Import Analyzer.
Innoslate's Import Analyzer consists of four essential steps that users follow to configure their Excel (CSV) import and accurately map their data to their Innoslate project's schema.
- Configure Settings
- Select a File
- Enter Custom Field Mapping
- Importing a Microsoft Excel (.csv) File
In the subsequent sections, we will provide a comprehensive breakdown of each step outlined above, accompanied by precise instructions to facilitate your understanding of the process. Additionally, we will discuss the capability to import relationships, supported by a concise sample to enhance your experience in this section.
Configure Settings
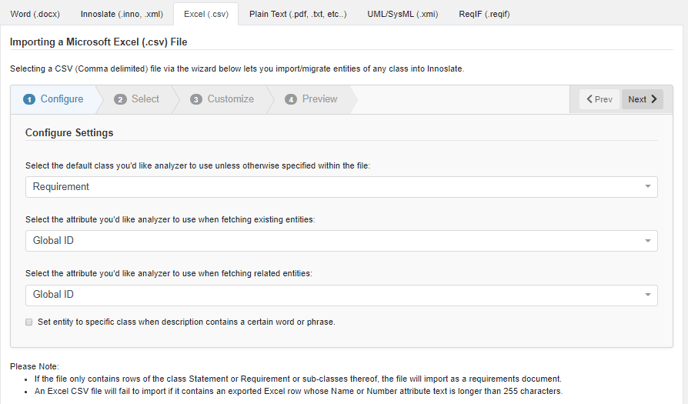
1. Open the 'Import Analyzer' and select the ‘Excel (.csv)’ tab.

Figure 2: Step 1 of CSV Import 'Configure Settings'.
2. Select from the drop-down menu which document type you'd like the analyzer to use. This will help the Analyzer indicate what classes to recall for step 4.
3. Choose the Document Label desired that corresponds to the selected document type from step 2.
4. Select the default class of entities that will be created during the import. You can either type in the field for your desired class or scroll through the options available in the drop-down list.
5. Select the attribute you’d like the analyzer to use when fetching existing entities. Search or scroll within the drop-down menus to find your desired attributes.
6. Select the attribute you’d like the analyzer to use when fetching related entities. Search or scroll within the drop-down menus to find your desired attributes.
| None | Compilation | Document | Presentation | Test Suite | |
| Default Class Options | All | All Classes, All | Statement, Requirement | Artifact | Test Case |
| Fetch Existing |
Global ID, Name, Number |
Global ID, Name, Number | Global ID, Name, Number | Global ID, Name, Number | Global ID, Name, Number |
| Fetch Related | Global ID, Name, Number | Global ID, Name, Number | Global ID, Name, Number | Global ID, Name, Number | Global ID, Name, Number |
Importing a Microsoft Excel (.csv) File

8. Drag and drop your .csv file over the drop area, or click within the drop area to browse your computer’s file system to select the file to upload.
9. When your ‘Analyzer Progress’ bar reaches 100 percent, ‘Done,’ click the ‘Next’ button to proceed to Step Three.
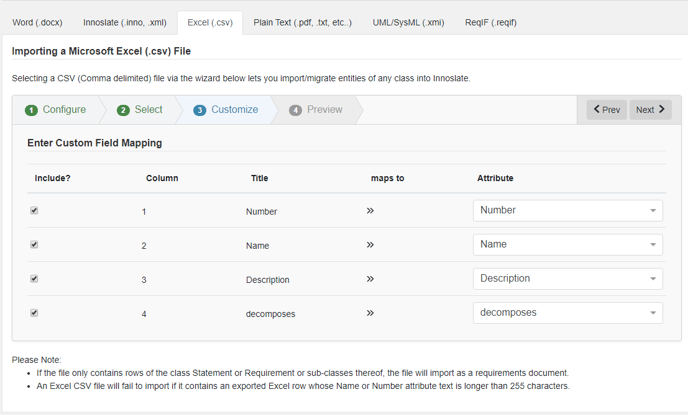
Enter Custom Field Mapping

10. In the ‘Custom Field Mapping’ wizard, you will need to identify the columns that you wish to import into Innoslate and accurately map them to the appropriate entity attributes. The default options presented will be influenced by your selections made in 'Step 1: Configure,' as well as the alignment of the Schema with your project's specifications and the names of the column headers.
11. Then, click the ‘Next’ button to proceed to Step Four.
Importing a Microsoft Excel (.csv) File
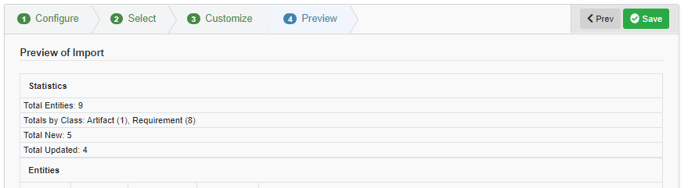
12. Verify the preview of the import is what you were expecting.
13. To finish the import process and save the entities to your current project’s database, click the ‘Save’ button. To go back, you can remap and modify as needed even reimport again by clicking the ‘<Prev’ button.

Figure 3: Preview of CSV Import
Importing Relationships
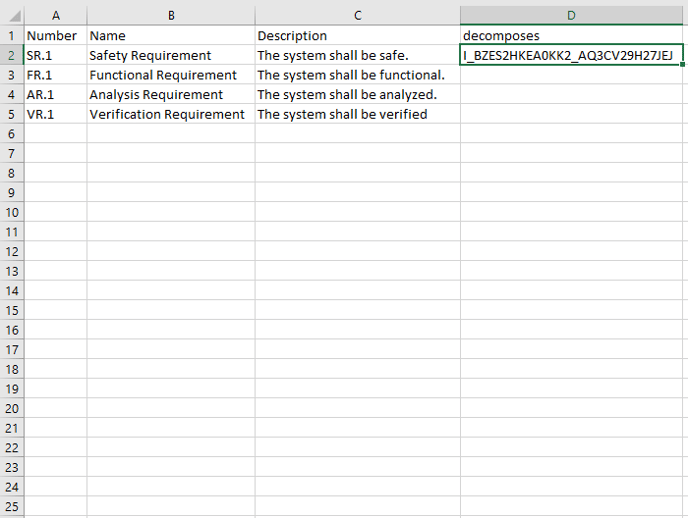
In order to import relationships using the CSV importer, the CSV file must be formatted with the relationship name as a column title
- Add the relationship name as a column title.

- Fill in the information as you normally would.

- Next, find the global ID of the target entity you would like to relate the entity to. There are multiple ways of doing this. One way is to look at the metadata.

- Copy and paste the Global ID into the relationship name column in the CSV.
- If the target entity is in another project, you will need to find the Project ID of the target entity. This can be found by looking at the URL.

- Enter the Global IDs into their respective columns, and if the relationships are cross-project, followed by a ‘-‘ and the project ID in the CSV. Note: The CSV Importer can handle cross-project relationships as long as the user has permission for both projects.
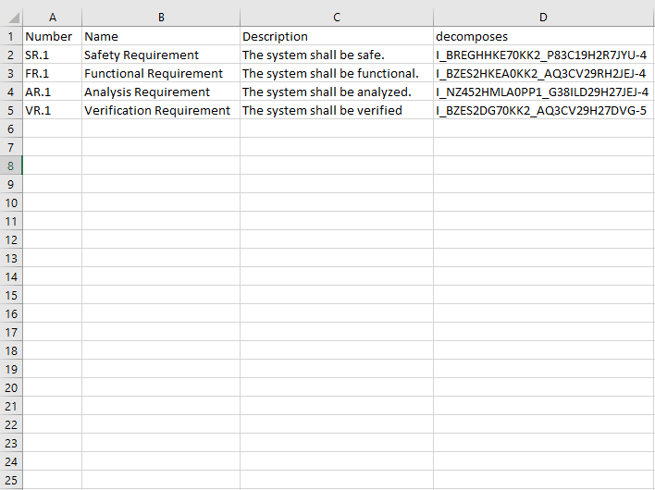
- Hit save when you are done, then go to the Import Analyzer. In step 1, make sure “Select the attribute you’d like analyzer to use when fetching related entities:” is set to Global ID.
- Continue with the import process as usual, and note the mapping in step 3. Make sure the relationship and Project ID is mapped correctly.
- Once Analyzer has finished, you should see the number of new and updated entities. Hit save, and you are all done.