
Sections Available in Discrete Event Simulator
| Function | Description |
| Overview | Gain an understanding of the simulator, its capabilities, and how it can be utilized to model and simulate systems in Innoslate. |
| Feature Panels | Discover the variety of featured panels in the simulator, providing interfaces for configuring simulation settings on Innoslate. |
| Global Tracker | Learn about the Global Tracker that tracks global variables during a discrete simulation. |
| Simulator Reports | Learn how to generate detailed reports and analyze simulation results in the Discrete Events Simulator. |
Overview
Discrete Event Simulation (DES) is the process of codifying the behavior of a complex system as an ordered sequence of well-defined events.
Innoslate’s real-time ‘Discrete Event Simulator’ allows you to execute a complex system as a discrete sequence of actions in time. This simulator is designed for analyzing a system or project’s cost, schedule, and performance. Innoslate’s simulation technology can be used for:
- Analyzing complex systems behavior and its parts (assets).
- Predicting system performance including time duration, cost, asset utilization, and resource consumption.
- Identifying process bottlenecks.
- Planning a schedule, allocating cost, asset utilization, and calculating resource performance (Project Management).
- Verifying the correct logical design.
By using Innoslate’s simulator, you can ensure that the simulation model and the functional model remain consistent throughout the lifecycle of your project. This prevents inaccuracies and inconsistencies that often occur when using external simulation tools.
Featured Panels
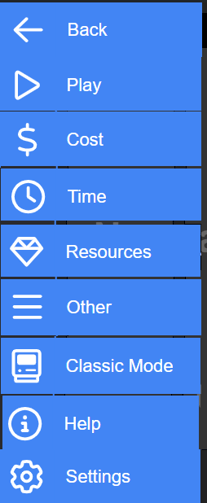
There are various selections of panels that users can utilize when using the discrete event simulation as shown above. Below we'll go over each panel's options.
Cost Panel
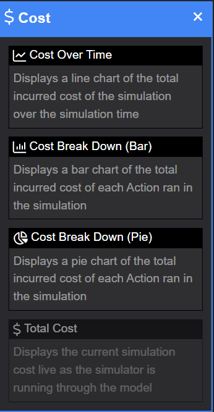
Cost Over Time
Displays a line chart of the incurred costs of the simulation over simulation time.
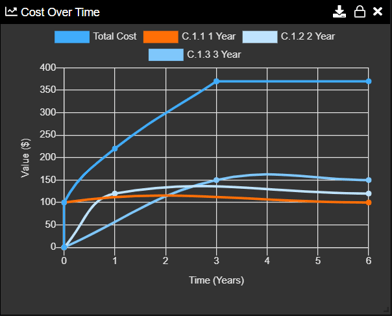
On startup, a model will pop up to select the panel’s specific options. This panel has an option to select which entities will be shown on the chart. Total can also be selected to get the total cost over time. On the Table of entities shown, the color can be specified for each entity/total.
Note: This chart can be edited and multiple charts can be created.
Cost Break Down (Bar)
Displays a bar chart of the incurred costs of each Action run in the simulation.
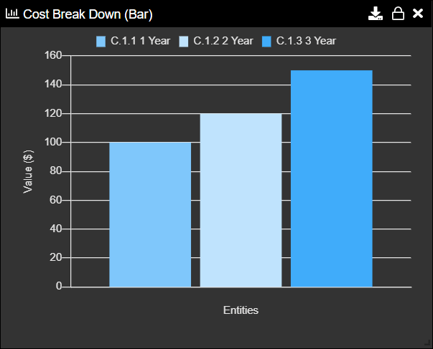
On startup, a model will pop up to select the panel’s specific options. This panel has an option to select which entities will be shown on the chart. On the Table of entities shown, the color can be specified for each entity.
Note: This chart can be edited and multiple charts can be created.
Cost Break Down (Pie)
Displays a pie chart of the incurred costs of each Action run in the simulation.
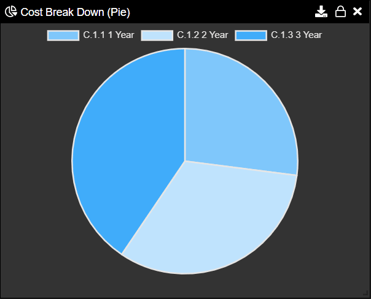
On startup, a model will pop up to select the panel’s specific options. This panel has an option to make the chart a ‘Pie Chart’ or ‘Donut Chart’ and which entities will be shown on the chart. On the Table of entities shown, the color can be specified for each entity.
Note: This chart can be edited and multiple charts can be created.
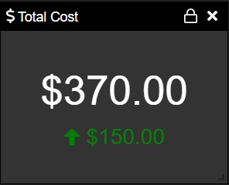
Total Cost
Displays the current simulation cost live as the simulator is running through the model.
Time Panels
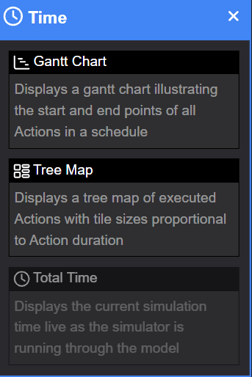
Gantt Chart
Displays a Gantt chart illustrating the start and end points of all Actions in a schedule.
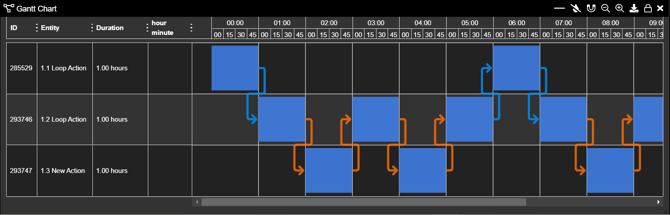
The ‘Gantt Chart’ panel has options on the top right of the panel:
Arrows  |
The ‘Arrow’ option allows arrows on the Gantt chart to be turned on/off. |
Line Color |
The ‘Line Color’ option allows the line colors from the Gantt chart to be turned on and off (line Color is added to entities in loops). |
Magnet |
The ‘Magnet’ option will reset the zoom and scale of the Gantt Chart. |
Zoom In |
The ‘Zoom In’ option will zoom into the Gantt Chart, increasing the time scale and making the entities larger. |
Zoom Out |
The ‘Zoom Out’ option will zoom into the Gantt Chart, increasing the time scale and making the entities larger. |
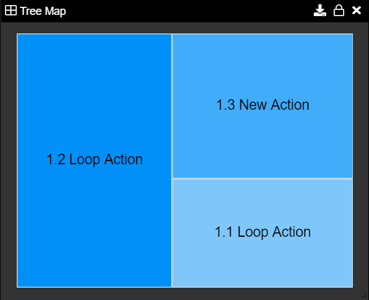
Tree Map
Displays a tree map of executed Actions with tile sizes proportional to Action duration.
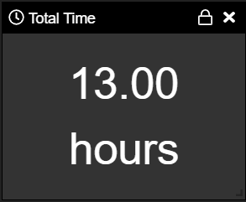
Total Time
Displays the current simulation time live as the simulator is running through the model.
Resource Panels
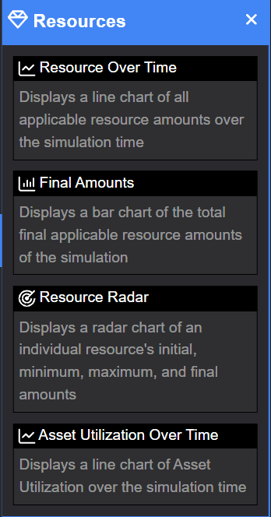
Resource Over Time
Displays a line chart of all applicable resource amounts over the simulation time.
Final Amounts
Displays a bar chart of the total final applicable resource amounts of the simulation.
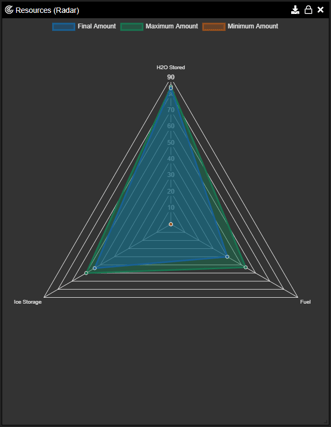
Resources (Radar)
Displays a radar chart of a selected resource’s minimum, maximum, and final amounts.
Asset Utilization (Radar)
Displays a radar chart of an selected asset’s amount utilized.
When initializing a Resource widget, you can select which specific resources to track and assign custom colors to each. To organize and differentiate your data further, you can create multiple widgets to track different sets of resources side-by-side.
Other Panels
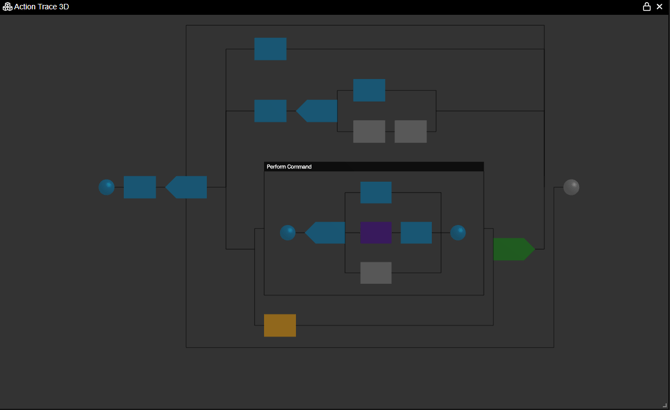
Action Trace 3D
Displays a 3D Action Diagram simulating all levels of decomposition live.
Wait States
The Action Trace 3D panels utilize colors to identify the Action’s state during simulation. The table below identifies each state and its appropriate color.
| Color | State | Description |
|---|---|---|
| Gray | Inactive | The Action was not activated or has been killed by a SYNC point. |
| Yellow | Input/Output Wait | The Action is waiting for an Input/Output(s). |
| Purple | Resource Wait | The Action is waiting for a Resource Amount(s). |
| Orange | Asset Utilization Wait | The Action is waiting for enough Asset performers to execute. |
| Maroon | Cloning Operation | The Action is currently being executed through a cloning operation. |
| Green | Executing | The Action is currently executing. |
| Blue | Complete | The Action has completed execution. |
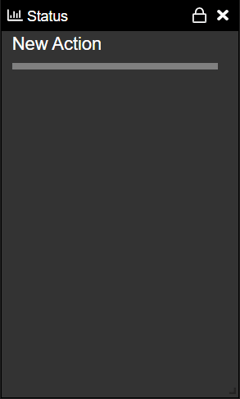
Status
Displays the current Action(s) running or waiting for an Input/Output, Resource, or Asset.
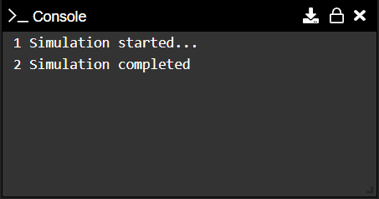
Console
Displays a console showing all scripted print lines and detailed error information.
Global Tracker
- Add a script to any Action entity in an Action diagram.
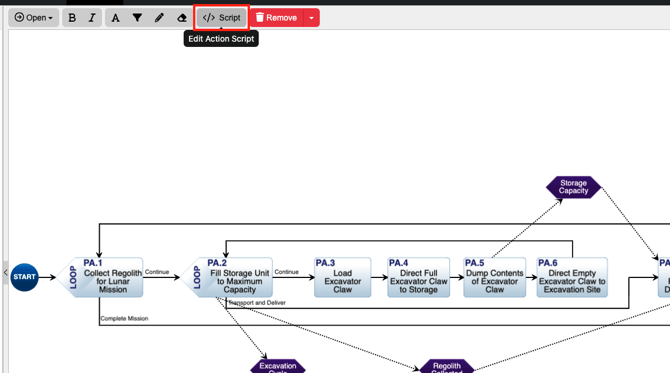
2. Enter a script and confirm an entity ID is being tracked in the script. This can be any Action entity in the Action diagram not just the entity with the script. Click ‘Submit’ to save.
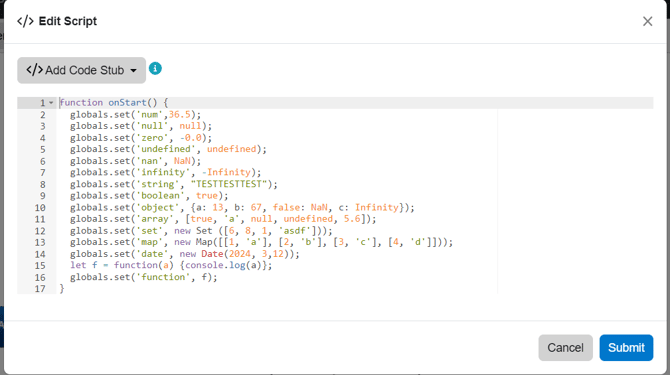
3. Go to the Discrete Event Simulator. In ‘Other’ Settings, add the Global Tracker panel to the simulator.
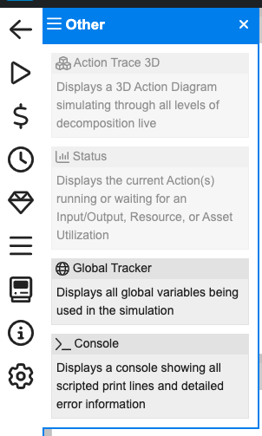
4. Once the Global Tracker panel has been added, play the Discrete Event Simulator. The user interface will track the globals.get to locate values and times of any type of object using the entity ID.
5. The Global Tracker panel now displays a table of Keys (Value Types) and their Values. Click a blue plus button anywhere in the table to expand its display, as shown below 'num' has been selected.
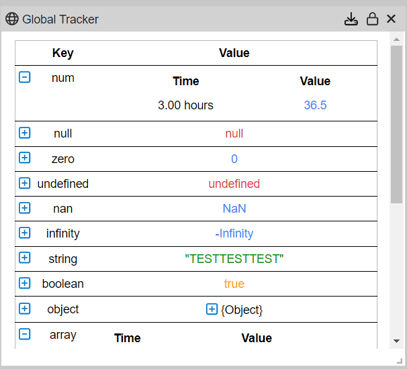
Note: The Console panel and Global Tracker now have color-detailed displays of objects that use the print command or global ID map, respectively.
Settings
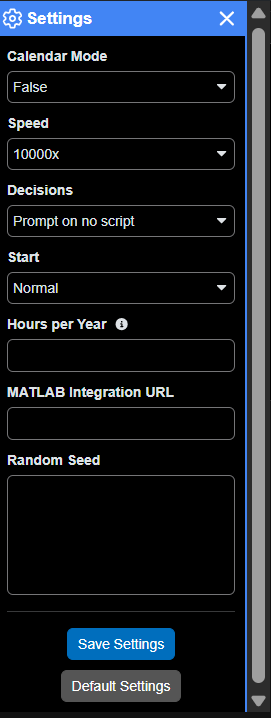
Discrete Event Simulation Settings available are as follows:
- Calendar Mode: enables calendar-driven simulations based on the entity “Start” attribute, and if Calendar Mode is enabled and the root entity doesn’t have a “Start” attribute set, the current time is used as the simulation start time.
- Speed: controls the simulator’s screen animation frame rate.
- Decisions: When the simulator runs into a decision, you can prompt the simulator to run on the script provided from the diagram or allows for a dialog for the decision during the simulation.
- Start: Normal or Debug. Normal Start or start the simulator in Debug Mode (starting paused on the first action so you can step through actions).
- Hours Per Year: Users can set how many hours per year they'd like to calculate in the simulator. If left blank, it simulates an average calendar year (8760 hours/year).
- MATLAB Integration URL: Enter your MATLAB URL if using the MATLAB Integration (for Enterprise only).
- Random Seed: used to seed the random number generator so you can reproduce the same decisions/distributions across independent runs
Simulator Reports
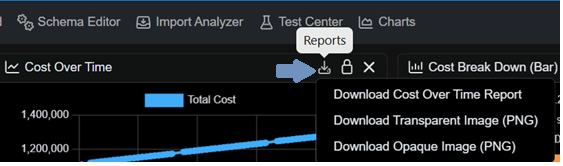
Once your Discrete Event Simulator run is complete, you can download performance reports directly from your workspace widgets.How to Download a Report
-
Locate the specific widget you want data from.
-
Click Reports on that widget's toolbar.
-
Choose your preferred format (CSV or PNG) and click download.
⚠️ Important Note on Availability: CSV/PNG Reports are available for mostly all widgets except the Gantt Chart (XML or PNG). To generate a report, the widget must be active (selected to display) before you start the simulation, and it must contain data from the run.
Customizing CSV Reports
When exporting to a CSV file, you can customize your download by selecting:
-
Column options (choose which data fields to include)
-
Sorting preferences
-
Custom File Name
Cost Over Time
Generates a PNG of the simulated graph or a CSV report displaying the cost of the selected entities throughout the simulation.
Cost Break Down Bar
Generates a PNG of the simulated graph or a CSV report displaying the break down cost of the selected entities throughout the simulation.
Cost Break Down Pie
Generates a PNG of the simulated graph or a CSV report displaying the break down cost of the selected entities throughout the simulation.
Gantt Chart
Generates a PNG or a XML for Microsoft Project of the generated Gantt Chart.
Tree Map
Generates a PNG of the map or a CSV report displaying the time proportions of the simulation run in a Tree Map format.
Resource Over Time
Generates an opaque or transparent PNG of the chart or a CSV report displaying the resources over time of the simulation run.
Final Amounts
Generates an opaque or transparent PNG of the chart or a CSV report displaying the final amounts of the simulation run.
Resource Radar
Generate an opaque or transparent PNG of the chart or a CSV report displaying the selected resource's minimum, maximum and final amounts.
Asset Utilization Over Time
Generate an opaque or transparent PNG of the chart or a CSV report displaying the Asset Utilization over the simulation time.
Action Trace 3D
Generate an opaque PNG of your Action Diagram.
Console
Generate a CSV of your Console Report.
Global Tracker
Generate a CSV of your Keys, Time and Variables in the Global Tracker widget. Note, no options will be provided in this CSV, it will automatically start downloading the report.
Export to Artifact
Users may also export their entire simulation as an Artifact after the run.
How to Export as an Artifact
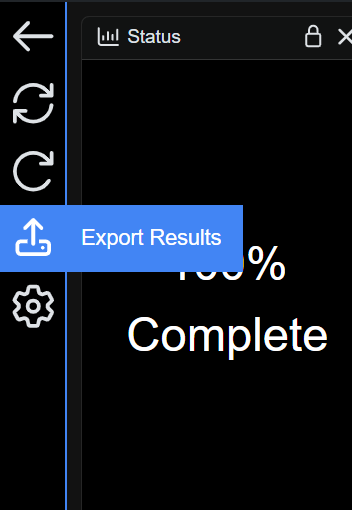
- After the Simulation run, select the 'Export Results' option on the left sidebar.
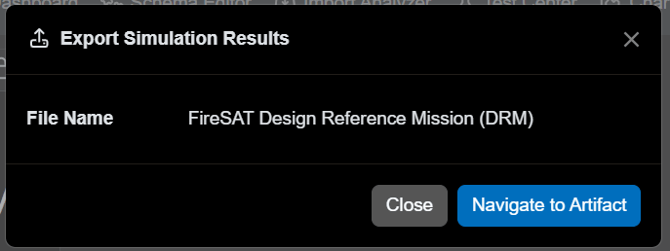
- Enter the File Name then select 'Export Results'.
- Close the Dialog or select 'Navigate to Artifact' to see the Artifact's Entity View.
Navigate back to the Exported Simulation
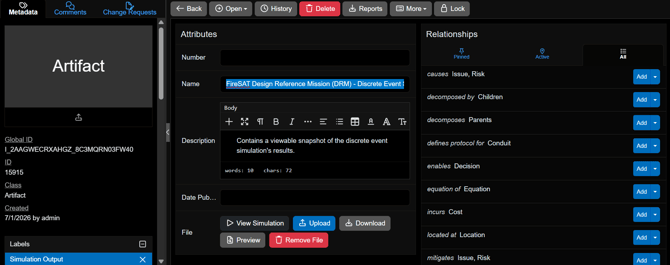
2. Select 'View Simulation'.
Note: This saved Artifact is a view of the results from that particular simulation run. You must rerun a new simulation and save it to a new artifact if you would like to make changes to save.
Tutorial Video
To continue learning about Simulators, Click Here.
(Next Article: Monte Carlo Simulator)