
Toolbar Features

In this article, we will delve into the different functionalities specifically offered under the 'More' option on the toolbar in Compilation View.
Auto Number

Auto numbering in Innoslate allows for the application of sequential numbers to entities within a Compilation, based on their hierarchical structure. This feature can be accessed by clicking on the 'More' dropdown in Compilation View. Once selected, a pop-up window will appear, allowing users to specify the starting number (defaults to 1 if left blank) and add a prefix, or choose to only add a prefix to the existing numbering scheme of the Compilation.

Note this will only add to the number field of an entity. To find and replace within the number field, use the Find and Replace feature.
Users may also use the Auto Number feature for just a certain section of the compilation by clicking on a parent entity within the compilation and clicking on 'More' then 'Auto Number.' Doing so will bring up the following window so users may selecto to re-number and/or add a prefix for that particular section of the compilation:

Users may also use the filter on the left sidebar to auto number those shown entities.
Baseline a Compilation
Creating a baseline for a Compilation captures a snapshot of the Compilation's entities, relationships, and attributes. To create a baseline, select the 'Baseline' option under the 'More' button on the top toolbar. Please note, only users who have the role of 'Owner' in the project are able to create a baseline for a Compilation.

A pop up will appear to name the baseline. Enter a Name and select 'Create'.

The entities in the Compilation will then be marked with blue baseline indicators to indicate that the Compilation has been baselined.

Review an Existing Compilation Baseline
To review an existing Compilation baseline, refer to the Baselines Tab on the left sidebar as circled in the image below.

In the Baselines section, users will find a list of their baselines along with their creation date and time, as indicated by the red arrow. By clicking on a baseline, users will be able to view all its entities, including their relationships and attributes, for that version of the Compilation. All baselines are displayed as read-only and cannot be edited. To resume editing a Compilation, simply switch back to the current version by clicking on the top Compilation link under Main Compilation, indicated by the red square in the image.
Quality Check

The Quality Check feature in Compilation View can only be applied to Requirement entities. For more information on this feature, please refer to our detailed Quality Check information here.
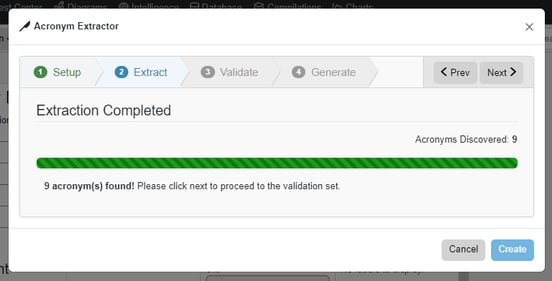
Acronym Extractor
The Acronym Extractor feature in Innoslate enables users to extract all acronyms from a current Compilation and compile them into a separate document, along with their corresponding full names. The Acronym Document created here will be available in Documents View.

When users select the 'Acronym Extractor' option, a popup will appear, allowing users to choose the 'Extraction Options' and the 'Confidence Level' under the 'Setup' tab. The 'Extraction Options' determine which fields the extractor will use to extract acronyms from the Compilation's entities. While the extractor will display all acronyms for the corresponding confidence level, the 'Confidence Level' selected in this step will be the one initially displayed in step 3.

- A 95% Confidence level means that the acronym is found multiple times in the Compilation with a possible detected definition.
- A 65% Confidence level means that an acronym is found once with a possible detected definition.
- A 40% Confidence level means that an acronym was found but there was not a definition detected with it.

In the ‘Generate’ tab there are to apply to the selected acronyms, such as where they will be stored, the traceability of the acronyms, and hyperlink the chosen acronyms to the Acronym Document.
- Under ‘Acronym Document’ users can select which document to add the acronyms to. Those options include adding acronyms to that specific Compilation’s acronym document or to an overall project’s acronym document.
- Under ‘Traceability’ users can select to create relationships from the acronyms to the current Compilation to the acronym document.
- Under ‘Hyperlinks Creation’ users can select to create hyperlinks to those acronyms from the Compilation to the Acronym Document.

Upon selecting the 'Create' button, Innoslate users will be redirected to the Acronyms Document, in Documents View.

Find and Replace
The 'Find and Replace' feature allows Innoslate users to find and replace certain words or phrases within the Compilation.

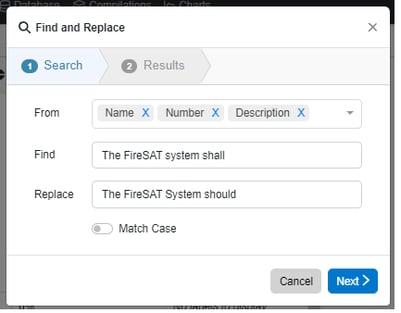

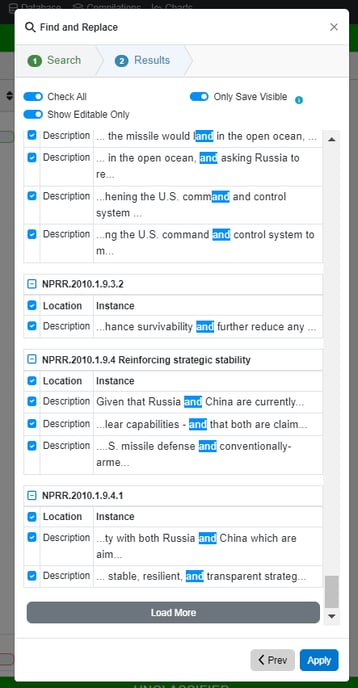
Click 'Apply' once complete so the replacement will execute.
To continue learning about Compilation View, Click Here.
(Next Article: Compilation View Reports)