Creating Organizations
After installation, Admins can create 1 or more organizational sandboxes.
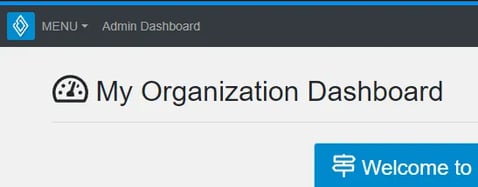
Once you have Innoslate installed on your server and have successfully completed the setup panel, login and navigate to your organization’s dashboard and click ‘Admin Dashboard’ in the upper left corner, next to the menu.

Once in your Admin Dashboard, you must create a new organization by clicking the ‘New Organization’ button at the top of the window.
Note, you may repeat the following steps if creating multiple organizational sandboxes on an Innoslate Enterprise instance. This can be helpful for many reasons such as different contract obligations, interdepartmental reasons, testing environments and so on.

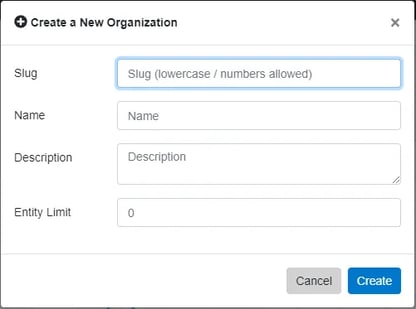
A window will appear prompting you to enter a Slug, Name, Description, and entity count. The slug is the short name that your organization will be referred to as in the URL. The name and description will appear when selecting between organizations to help you differentiate between them. The entity count is the number of entities you would like to have in your organization and this number is limited by your license of Innoslate (Note, if you set the Entity Count to 0, this is telling the database to make infinity entities).

- The entity limit zero (0) indicates unlimited entities.
- Do not use the slug 'socket'. This is already reserved and used internally in the application.
Once you have your organization set up, navigate to the bottom of your organization’s Admin Dashboard to the License window and click the pencil icon.

In the editing window, you must change the ‘License Date of Expiration’ to any date no later than the ending date of your license key. This is done by clicking in the date box and typing the desired date.

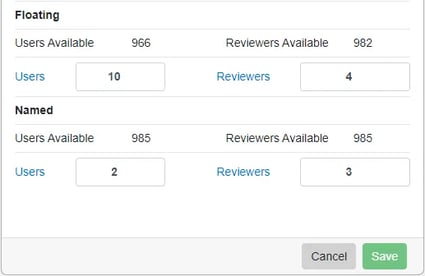
After, you must edit the number of ‘Floating Users,’ ‘Floating Reviewers,’ ‘Named Users,’ and ‘Named Reviewers’ by clicking in the box next to the desired option and typing. You can have up to the number of users or reviewers as specified above in the text box, but remember that all organizations you create will share those licenses. If you use all of your licenses on one organization, it will not allow any other organizations to have a license.

To continue learning about Innoslate Enterprise Super Admin Docs, Click Here.
(Next Article: Cleaning Dashboard)
