
| Action Constructs Connections | Action Constructs Editing Options |
| I/O Construct Connections | I/O Construct Editing Options |
| Resource Construct Connections | Resource Construct Editing Options |
| Branch Asset Construct Connections | Branch Asset Editing Options |
| Multiple Actions Selected Edits | Multiple Actions Editing and Options |
| Line Construct Editing | Line Construct Editing Options |
| Start/End Construct Editing | Start & End Nodes Editing Options |
| Action Diagram's Settings | Action Diagram's Settings Overview |
The previous article on the Action Diagram provides users with an introductory explanation of the constructs and their functionality on the canvas. In the following section, we will delve into more detail about the options available for the canvas constructs and the toolbar frame options that change dependent on the selected constructs.
Serial, Parallel, Or, Loop, Sync Constructs on the Canvas
Any of the 6 Action constructs in an Action Diagram canvas can connect to another Action construct, an I/O construct and a Resource construct. When a construct is selected, there will be a blue frame indicator indicating the entity is selected and green dots on each side of the construct to indicate users can connect the construct from one construct to another. By creating the constructs and connecting them, this will create relationships in the database automatically.
To create a connection, the user will need to click on a green dot so a line will appear and drag the line to another construct to connect to it, as shown below. Below we will go over what constrcuts in an Action Diagram can be connected to other constructs available for this diagram.
Action Constructs Connect to another Action
In the Action Diagram, any Action constructs in the Action Diagram may be connected to another Action construct. This action will create an Input/Output entity.

Upon dragging the line to another Action construct, the construct will have a Trigger or Optional choice as shown above. This is to determine the Relationship Attribute for the I/O entity to the Action. When dragging the line from the Action, users must drop the line on either Trigger or Optional (the selected choice will highlight for confirmation). Since this is setting a Relationship Attribute, this can be confirmed with the left sidebar, as shown below.

The trigger option will set the I/O to be green and the relationship attribute on the left sidebar says 'Yes' for the Relationship Attribute. If 'Optional' was chosen, it would be gray (like Payload in the canvas in the image above) and the Relationship Attribute 'Trigger' would say 'No'. To change the I/O relationship attribute from Trigger to Optional (or vice versa) users can use this dropdown on the left sidebar under the Relationships Tab, as highlighted in the red square, or simply redrag and redrop a line to the correct option on the canvas.
Since connecting an Action Entity to another Action Entity creates an I/O, the relationship created here is the Action generates the I/O. The I/O then must be recieved somewhere, so the I/O in the image above is being received by the OR Action 'Perform normal or contingency ops.' This can be confirmed with the left sidebar, as shown below.

Action Constructs Connect to Resource

When users use the green dot from an Action Entity and use the line to connect to a Resource like shown above, a black dotted line will appear (image below). This creates the relationship that the Action Entity produces the Resource it is pointed to.

On the other end of the Forest Fire Resource construct, it is connected to the Extinguish Forest Fire Action construct. This indicates the Extinguish Forest Fire construct consumes the Forest Fire Resource. Which can be confirmed in the left sidebar under the Relationships Tab (Red square in image below).

Action Constructs Connect to I/O
If not using the first option of connecting one Action entity to another in the canvas , users may also drag and drop the I/O construct on to the canvas first then connect the Action Entity to it. This option is particularly helpful when using already existing I/Os.

Action Construct Editing Options
Upon selecting an Action construct, the top of the toolbar frame changes so users may modify it.

These specific options for modifying an action construct will be covered below.
 The Bold option will bold the name of the entity selected on the canvas.
 The italicize option will italicize the name of the entity selected on the canvas.
Using the HTML Color Picker that drops down from the Text Fill Color Option, users can change the text color of the multiple entities selected on the canvas by selecting the color associated close to the desired color simply inputting in the fields the proper Hex, R, G, B codes and numbers.


Using the HTML Color Picker that drops down from the Change Line/Stroke Color Option, users can change the color that borders the construct of the entity selected on the canvas.


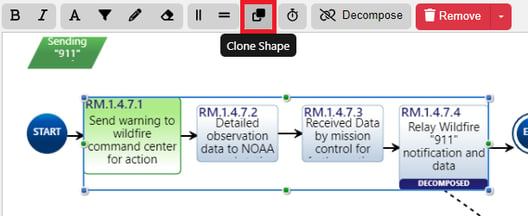
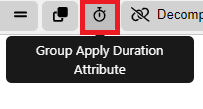
When an Action Entity is decomposed by children entities, a Flatten button will appear so users may 'flatten' the hierarchy and have the children actions appear on the diagram in the parent's place. This will remove the decomposed by relationship between the Parent and Children entities.

Users can use the Script option to access and leverage the Javascript functions that are available to enhance their Action Diagrams. For more on the Script button, please see this article.
Input/Output Selected
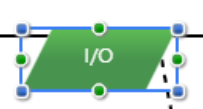
An I/O construct can connect to 2 constructs in the Action Diagram canvas, an Action construct and another I/O by dragging the line generated from one of the green dots on the blue frame and dropping it to either of the aforementioned constructs.
Input/Output to Action Construct
As mentioned earlier in this article, this particular scenario is helpful when using an already existing I/O and dragging and dropping the existing I/O from the Existing Tab on the left sidebar.
By dragging the I/O line to an Action construct, the entity will have a Trigger or Optional choice. This is to determine the Relationship Attribute for the I/O to the Action. When dragging the line from the I/O Entity, users must drop the line on the Action entity and select if the I/O will Trigger the Action or use the Optional option (the selected choice will highlight for confirmation).
Input/Output to Input/Output Construct

When connecting one I/O to another I/O construct in the Action Diagram canvas, it creates decomposition. The I/O the user is starting with is the parent and the I/O it connects to will be the child. This can be confirmed with the left side bar as shown below.

I/O Toolbar Frame Options

When an I/O is selected in an Action Diagram, the toolbar frame options for it are explained below.
 The Open button allows users to open the entity up into another view.

This option will bold the name of the entity selected on the canvas.
This option will italicize the name of the I/O selected on the canvas.
Using the HTML Color Picker that drops down from the Text Fill Color Option, users can change the text color of the multiple entities selected on the canvas by selecting the color associated close to the desired color simply inputting in the fields the proper codes and numbers.

Using the HTML Color Picker that drops down from the Text Fill Color Option, users can change the color of the construct of the entity selected on the canvas.

The Reset color back to default option will change the entity selected on the canvas back to the default gray and black colors.
Resource
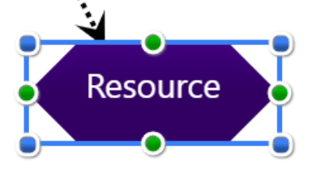
A Resource construct can connect to any of the Action constructs only. Upon dragging the line from a green dot to an Action Construct, the construct will change to drop the line so that the resource can either be consumed or seized by the Action, as shown.
Per the LML Specification 1.4, consumes identifies the Resource that this Action uses. After this Action is completed, the amount consumed is not returned to the Resource.

Per the LML Specification 1.4, seizes identifies the Resource that this Action uses. After this Action has completed the Resource is released for use by other Actions.
Resource Editing Options

Upon selecting a Resource, the toolbar frame options are explained below.
 The Open button allows users to open the entity up into another view.
 This option will Bold the name of the entity selected on the canvas.This option will Italicize the name of the entity selected on the canvas.
Using the HTML Color Picker that drops down from the Text Fill Color Option, users can change the text color of the multiple entities selected on the canvas by selecting the color associated close to the desired color simply inputting in the fields the proper codes and numbers.

The Reset color back to default option will change the entity selected on the canvas back to the default gray and black colors.
Branch Asset

Branch Asset constructs are Actors or Performers that can be added to parallel branches in an Action Diagram. Upon dragging and dropping the construct on to the branch, the branch will turn green to indicate where the Actor will be applied on the canvas, as shown below. 
If an Action is already on the parallel branch or is added later, a relationship is made that the Actor is performing tje Action on that branch, along with any other actions on the same branch. This can be verified on the left sidebar, as illustrated below.

The options highlighted below will be cover the options for a Branch Asset in the section below.

This option will 'bold' the name of the Branch Asset selected on the canvas. This option will 'Italicize' the name of the Branch Asset selected on the canvas.


The 'Reset color back to default' option will change the construct selected back to the default black.
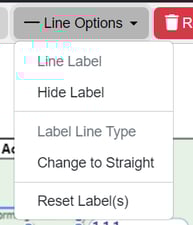
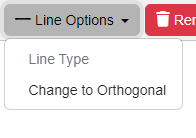
When dragging the label name, a line will appear for better clarity on the name of the line. Users can customize the line connecting to the Actor Branch label by utilizing the Line Options dropdown. Choices include to hide the label, change the line to a straight or orthogonal connection, or reset the label to its default settings. This includes applying the label to the branch without a line connector and reverting back to the default black color (excluding any changes made to the branch color).
Multiple Actions Selected

Users may drag their cursor outside of the constructs and a box will appear to select as many multiple entites the user desires. Many features on the top toolbar will appear upon doing so for the user to utilize. Let's go over each option as highlighted below.

 This option will 'Italicize' all the names of the multiple entities selected on the canvas.


Using the HTML Color Picker that drops down from the 'Change Fill Color' Option, users can change the color of all the constructs selected on the canvas.
Using the HTML Color Picker that drops down from the Change Line/Stroke Color Option, users can change the color that borders the constructs of the multiple entities selected on the canvas.


Action Diagram Canvas Line Constructs
The lines in the Action Diagram are not entitites in the database and are merely indicators for the flow of the diagram for the constructs. The options covered below go over the styling options for these lines for the diagram. Note, there are some lines in the Action Diagram that have only some of these options, this is particularly true for Loop Action lines, OR lines and Sync lines.
Line Options on the Top Toolbar Frame

In the above image, the line construct between Continue Operations and the I/O is selected, as indicated in blue by Innoslate and the red circle for this example. As shown in that image above, the line construct is not an entity since the left sidebar did not change, but the top toolbar frame did change to provide the following options for the user to select and modify as desired. The options are highlighted in the red square in the image above and each are explained in more detail below. These options are applicable for lines that connect Action to I/O, I/O to I/O & Action to Resource and Parallel Action lines.

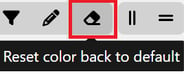
The color of the line can change with this option. Users have the option to use the HTML color picker by typing in the numbers or code to the HEX, R, G and B fields for the color the user desires.

The Reset option will set the line back to the default option. Normally the default color is black, unless it's an optional I/O (gray).
.png?width=316&height=108&name=remove%20dropdown%20line%20act%20diag%20canvas%20(1).png)
Start/End Selected

Upon selecting the Start and End nodes on the canvas of the Action Diagram, there are two options as shown above. These options on the top toolbar are to Change the Fill Color with the HTML Color Picker. The right option is to Reset the Color back to the default blue color.
Settings

At the top right corner of the toolbar frame, you will find a wrench icon and is the Action Diagram's 'Settings' button. This fixed button opens up a menu of settings that allow users to customize their Action Diagram. Let's explore each option in detail below.

Highlighted in red, the initial set of options offers users the ability to display or hide constructs such as Resources, I/Os, Parent I/Os, and Cross-Project Indicators on the canvas.

Users can also create an Asset Diagram from their Action Diagram, provided that the necessary relationships have been established with the Actions and that the Branch Actors are included in the Diagram.![]()
Users may also Auto Number their diagrams, where a pop up shows up to allow users to use the action order to determine the number sequence, provide a Prefix or enumerate the single level, as shown below.

Lastly, the final options provide users to layout and reset the diagram and go directly to the Help Center page for the Action Diagram for convenience.

Hide Sidebar on the Left of the Toolbar Frame
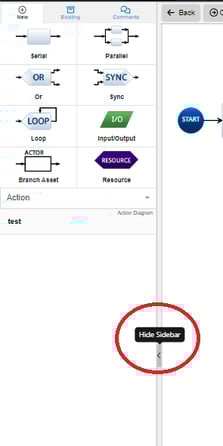
If you're unable to locate the left sidebar and/or want to hide it for presentation purposes, remember to use the Hide Sidebar option located on the left side of the Toolbar Frame.

To continue learning about LML Diagrams, Click Here.
(Next Article: Executing your Action or Activity Diagram)