IDEF0 Modifications & Settings
We'll cover the editing and settings options provided in the IDEF0 Diagram.
| Function Construct Editing | An overview of the editing options for Function Constructs. |
| Mechanism, Input/Output/Control Construct Editing | An overview of the editing options for the I/O, Control and Mechanism Constructs. |
| Line Construct Editing | An overview of the editing options for Line Constructs. |
| Multiple Construct Editing | An overview of the editing options for multiple constructs. |
| IDEF0 Settings | An overview of the setting options for the IDEF0. |
Function Construct Editing
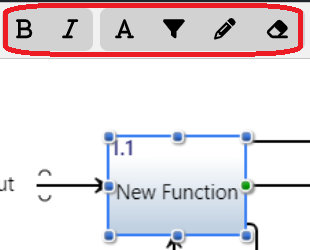
Upon selecting the Function (Action) construct on the canvas, the top of the toolbar frame changes to provide editing options for users to modify it. The options highlighted above will be covered below.
Bold
This option will Bold the name of the Function construct selected on the canvas.
Italicize
This option will Italicize the name of the Function construct selected on the canvas.
Change Text Fill Color
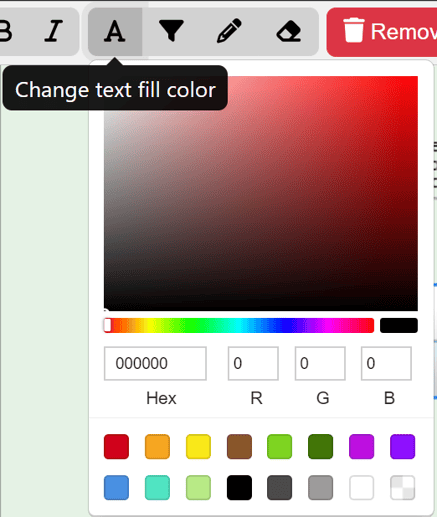
Using the HTML Color Picker that drops down from the Text Fill Color Option, users can change the text color of the Function construct selected on the canvas by selecting the color associated to the desired color or by simply inputting in the Hex, R, G, B fields the proper codes and numbers.
Change Fill Color
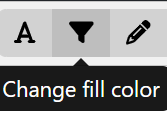
Using the HTML Color Picker that drops down from the Change Fill Color Option, users can change the filling color of the Function construct selected on the canvas.
Change Stroke/line color

Using the HTML Color Picker that drops down from the Change Stroke/Line Color Option, users can change the color that borders the Function construct selected on the canvas.
Reset Color back to default

The Reset color back to default option will change the Function construct selected on the canvas back to the default gray and black colors.
Mechanism, Input/Output/Control Construct Editing
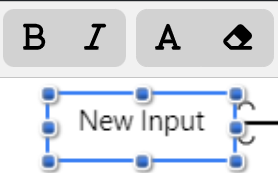 When you select an Input/Output/Control construct on the canvas, the toolbar frame at the top changes to display editing options shown above that allow you to modify it. These options will be explained in detail below.

This option will Bold the name of the construct selected on the canvas.
This option will Italicize the name of the construct selected on the canvas.
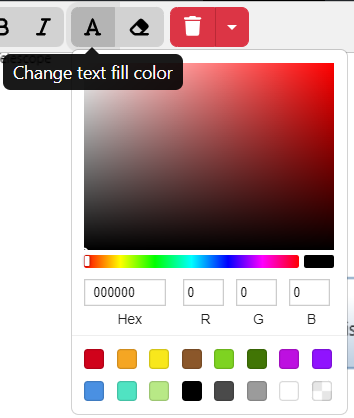
Using the HTML Color Picker that drops down from the Text Fill Color Option, users can change the text color of the construct selected by selecting the color associated to the desired color or by simply inputting in the Hex, R, G, B fields the proper codes and numbers.

The Reset color back to default option will change the text selected back to the default black color.
Line Construct Editing
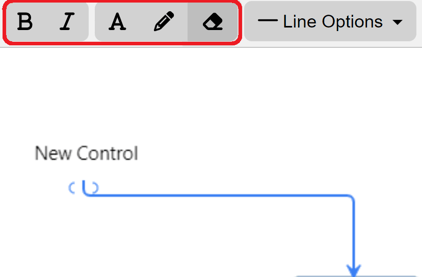
Bold

This option will Bold the label of the construct selected on the canvas.
Italicize

This option will Italicize the name of the label construct selected on the canvas.
Change Text Fill Color
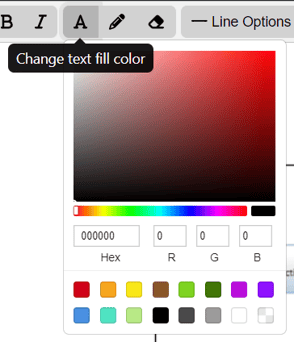
Using the HTML Color Picker that drops down from the Text Fill Color Option, users can change the text color of the label on the construct selected by selecting the color associated to the desired color or by simply inputting in the Hex, R, G, B fields the proper codes and numbers.
Change Stroke/Line color
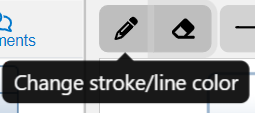
Using the HTML Color Picker that drops down from the Change Stroke/Line Color Option, users can change the color of the line construct selected on the canvas.
Reset Color back to default

The Reset color back to default option will change the selected line construct back to the default black color.
Line Options
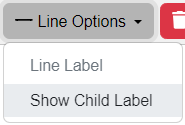
A Child label is available for users who need an additional label for their line constructs on their IDEF0 diagram. This feature is especially useful for line constructs that are very long since the initial label is given at the initial point of the construct. The Child label will display the name of the Input/Output/Control that is given, as shown in the example below. Users may drag and drop the child label to make the line appear like in this image.
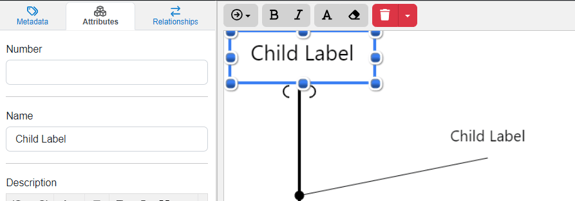
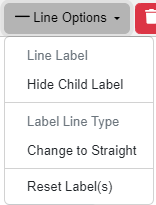
Once users select to show their Child Label, the Line Options dropdown allows users to show/hide the child label and change the label line to be straight or curved. The last Reset Label option will revert any changes made can also be reset to the default state of black text with no line connector to the line construct.
Multiple Construct Editing
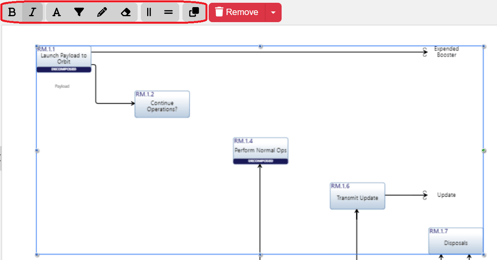
Users may drag their cursor outside of the constructs on the canvas and a box will appear to select as many multiple entites the user desires. Many features on the top toolbar will appear upon doing so for the user to utilize. These changes will be applied to the Function constructs. Let's go over each option as highlighted above.
Bold

This option will Bold all the names of the multiple constructs selected on the canvas.
Italicize

This option will Italicize all the names of the multiple constructs selected on the canvas.
Change Text Fill Color
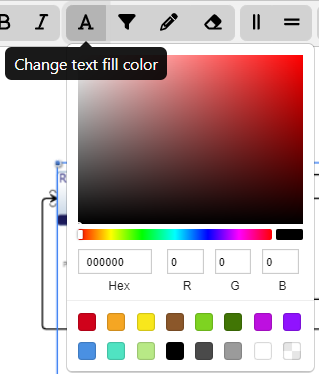
Using the HTML Color Picker that drops down from the Text Fill Color Option, users can change the text color of the multiple constructs selected on the canvas by selecting the color associated close to the desired color simply inputting in the fields the proper codes and numbers.
Change Fill Color

Using the HTML Color Picker that drops down from the Text Fill Color Option, users can change the color of the constructs selected on the canvas.
Change Stroke/line color

Using the HTML Color Picker that drops down from the Change Line/Stroke Color Option, users can change the color that borders the constructs selected on the canvas.
Reset Color back to default

The Reset color back to default option will change the multiple constructs selected on the canvas back to the default gray and black colors.
Align Vertically

This selection will align the constructs verttcevally for the multiple constructs selected on the canvas. The construct that turns green is tically

This selection will align the constructs horizontally for the multiple constructs selected on the canvas. The construct that turns green is the starting point of the alignment.
Clone Shape
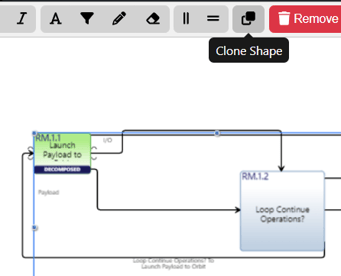
The Clone Shape option is to bring size uniformity to the diagram's constructs. When this option is selected, the green highlighed entity will be what the other constructs clone to so they are all the same size.
IDEF0 Settings
Shown above is the wrench icon that is is a fixed dropdown at the top right of the toolbar and is where more settings options are available for users to utilize for the IDEF0. Below we will go down the list explaining each option available.
Rule Check
When users select Rule Check from the Settings dropdown, Innoslate will check the model for the following:
- Diagrams must have between three (3) and six (6) Actions on it.
- Actions must have one Control.
- Actions must have one Output.
If constructs do not meet these rule, a pop up will appear to suggest users what constructs do not meet these rules.
Generate Asset Diagram
The Generate Asset Diagram option on the Settings Dropdown will create a physical context construct of the Diagram's Root Entity. Upon selecting the Generate Asset Diagram option, the root entity's children Assets will appear on the generated Asset Diagram.
Generate Requirements
The Generate Requirements option will create a Requirements Document in Innoslate of your IDEF0 diagram. However, note this option is available as long as the following conditions are met:
The 'Generate Requirements' option on the Settings dropdown is not available for the Root level of the hierarchy. If users try to do so, a warning will appear that states "Root level Action Diagrams (level 0) cannot produce Requirements Documents. All decomposed Action Diagrams (level 1) will generate documents as expected."
Finally, it is important to note that a warning will be displayed if an asset does not have a perform relationship with the root entity.
Cross-Project Indicators
This selection allows users to hide or show the indicators on the constructs being brought in from other projects.
Auto Number, Layout and Reset Diagram
Users may Auto Number their diagrams, where a pop up shows up to allow users to use the action order to determine the number sequence, provide a Prefix or enumerate the single level, as shown below.

Lastly, the final options provide users to reset their diagram and layout the diagram after changes have been made.
The very last option, 'Help,' will send users directly to the Help Center page for the IDEF0 Diagram for convenience.
To continue learning about General Diagrams, Click Here.
(Next Article: ICOM (A0) Diagram)

